Wednesday, April 18, 2012

Linguini with Roasted Vegetables and Tomato Basil Chicken Meatballs

Good morning bloggers. I know it's been a while since I've posted anything. I have to say that I've missed everyone. These past few weeks have been crazy. My family had an emergency. My brother ended up in the hospital, but he is now back on the road to recovery. As for me, I'm in the midst of trying to land an awesome apartment with my husband. I mean, REALLY awesome apartment. There are spiral stairs, a fireplace, and a huge patio. We may or may not get that apartment, but whatever we do, we are definitely getting an apartment there. Now, on the topic of food, we will be making linguini with chicken meatballs. I know, I know... Who uses chicken to make meatballs? Simple answer: we do. So, grab those aprons and let's meet back in the kitchen. See you there!


Linguini with Roasted Vegetables and Tomato Basil Chicken Meatballs


You will need:


  • 1 package Tomato & Basil Chicken Meatballs
  • Extra virgin olive oil with garlic
  • 1 pint fresh red cherry tomatoes
  • 1/2 pound asparagus, cooked and drained
  • 1 white onion, sliced 1/8 inch thick
  • 3 fresh garlic cloves
  • 8 ounces linguini pasta, dry
  • 1/4 cup extra virgin olive oil
  • 1.5 teaspoons black pepper
  • 1/2 cup fresh chopped basil leaves
  • 1/4 cup Parmesan cheese, grated
  • 1/4 teaspoon salt


Ready?


  1. Preheat the oven to 425 degrees.
  2. Toss the cherry tomatoes, asparagus, onion and garlic with 2 tablespoons of the olive oil, and 1 teaspoon of the black pepper.
  3. Spread the mixture on the sheet pan, and roast for 10 to 12 minutes.
  4. Stir half way and continue to roast until nicely browned.
  5. Meanwhile, cook the linguini according to package instructions.
  6. Reserve 3/4 cup of the pasta liquid.
  7. Drain the pasta and keep warm.
  8. Prepare a large saute pan with cooking spray.
  9. Brown the tomato basil chicken meatballs over medium high heat for 4 to 5 minutes.
  10. Add the cooked pasta in with the roasted vegetables and toss together.
  11. Lower the heat to medium, add remaining olive oil, basil, Parmesan cheese, salt, 1/2 teaspoon of black pepper, 1/2 cup of the pasta water, then toss well.
  12. Serve immediately with crusty Italian bread.


Thank you for joining me today. I am making a heavy effort to try and get my behind back into gear. As long as I am still located where I am, I will do my best to be back here most days. Once I move, I will be on here as soon as possible. Have a great day and I'll catch you on the flip side. Happy blogging to all! <3

Wednesday, March 28, 2012

Diabetes, Conquer the Recipe Beast!

Good afternoon bloggers! Welcome to another issue of Everyday Meals. As always, I'm your host, Mandie. Today, we are going to begin our transformation in this blog. I found out some news the other day that was less than entertaining. I think it's important for everyone to have a little knowledge on diabetes. There are 3 main types, Type 1, Type 2, and Gestational Diabetes. I'm not going to lie and say that these are the only kinds of diabetes, because they aren't. Type 1 and Type 2 can be controlled with medication. Neither of them can be cured. I have the offspring of a type of diabetes. I have Hyperglycemia. This is where the body circulates an excessive amount of glucose in the blood plasma. If these are not properly taken care of, they can become harmful and even life threatening. If you think that you might have diabetes, contact your doctor and make an appointment as soon as possible. Now, moving on. Our recipe for today is indeed a diabetic recipe. This is due to the fact that I have to make changes in my life, including food. I'm not going to constantly spam you with diabetic recipes, but I think it is wise to have some options. Now, grab those aprons and let's get in the kitchen! I'll meet you there!


Macadamia and Oat Encrusted Halibut  


You will need:


  • 6 halibut fillets
  • 1 cup oats
  • ½ cup chopped macadamia nuts
  • 1 tablespoon chopped thyme
  • 1 teaspoon minced garlic
  • dash salt
  • ¼ teaspoon cayenne pepper
  • 3 tablespoons water
  • 1 egg white  


  1. Preheat the oven to 400 degrees.
  2. Spray a casserole dish with cooking spray.
  3. Combine the oats, nuts, thyme, garlic, salt, and cayenne pepper in a large dish.
  4. In another medium-sized dish, beat the water and egg white until frothy.
  5. Dip the halibut fillets into the egg mixture and coat the fillet.
  6. Dip the halibut into the oat mixture.
  7. Place the halibut fillets in the casserole dish and bake for 10 to 12 minutes or until the fish appears to flake easily with a fork.
  8. Plate and enjoy!  


Thank you for coming out to enjoy an awesome recipe. Be aware that, even if you have diabetes, you can eat some amazing meals. Don't let the misconception fool you. It's about eating properly and being aware of labels. Go out into the world, and enjoy the rest of your day. Seize the day! Carpe Diem my friends and happy blogging to all! <3

Monday, March 26, 2012

Potato, Mushroom, and Leek Croquettes

Good afternoon bloggers. After a long and seemingly slow weekend, I return to you with a lovely, light recipes that has very low calories and is excellent for those vegetarians out there. We are serving up an awesome dish called croquettes. For those of you who are not aware of what croquettes are, I will school you briefly before we begin. A croquette is a fried food roll containing various ingredients, and encased in breadcrumbs. The croquette is often shaped like a cylinder or disk and deep fried. The word croquette comes from the French, croquer, "to crunch". Did you know that croquettes are a staple in Louisiana? They are also served up in various coastal city areas and make for an amazing snack. There's definitely no shortage of croquettes around the United States. They are served everywhere, especially in New England, coastal cities, and the deep South. Phew! I know that's a lot to take in, but now that we've had the run through, I think it's time to step into the kitchen. Care to join me? Great! I'll see you there!


Potato, Mushroom, and Leek Croquettes


You will need:


  • 8 ounces Yukon gold potato, coarsely chopped and peeled
  • 4 ounces sliced cremini mushrooms 
  • 4 ounces sliced button mushrooms 
  • 1/2 cup chopped leek 
  • 1 teaspoon chopped fresh thyme 
  • Cooking spray 
  • 1/2 cup shredded Gruyere cheese 
  • 1/4 cup grated Parmigiano-Reggiano cheese, divided 
  • 1/2 teaspoon kosher salt 
  • 1/2 teaspoon freshly ground black pepper 
  • 1 large egg yolk
  • 1/3 cup all-purpose flour 
  • 1 large egg white
  • 2 teaspoons water 
  • 1/2 cup panko
  • 1 tablespoon olive oil 


Ready?


  1. Place the potatoes in a pan, then cover with water. 
  2. Bring to a boil, then reduce heat and allow to boil for 8 minutes or until tender. 
  3. Drain the potatoes. 
  4. Press the potatoes through a ricer or food mill into a bowl.
  5. Place the mushrooms, leek, and thyme in a food processor, then pulse until finely chopped. 
  6. Heat a large skillet over medium heat. 
  7. Coat the pan with cooking spray. 
  8. Add the mushroom mixture and cook for 6 minutes, stirring occasionally. 
  9. Toss in the potato with the mushroom mixture. 
  10. Add the Gruyère, 2 tablespoons Parmigiano-Reggiano, salt, pepper, and egg yolk, then stir until blended. 
  11. Shape the mixture into 8 round patties.
  12. Place flour in a shallow dish. 
  13. Combine the egg white and 2 teaspoons water in a shallow dish, stirring with a whisk. Combine the remaining 2 tablespoons Parmigiano-­Reggiano and panko in another shallow dish. 
  14. Dredge the patties in flour. 
  15. Dip the patties in the egg mixture, then dredge in the panko mixture. 
  16. Heat a large non-stick skillet over medium-high heat. 
  17. Add oil and swirl to coat. 
  18. Cook the patties for 4 minutes on each side or until golden.
  19. Serve with a fresh Romaine salad and enjoy!


Thank you for taking time out of your busy day to join me for another adventure in cooking. I will be back soon with another delightful recipes. Until then, have a great day and happy blogging to all! <3

Thursday, March 22, 2012

Garlic Cheddar Chicken

Hey bloggers! Welcome to another delicious entry to Everyday Meals. Today, I chose our recipe based on the fact that my family loves, loves, loves garlic. We also love cheese on a ton of things. My husband, for one, puts mild cheddar cheese on almost everything. He is a real picky eater, but if cheese is involved, I know for a fact that our dinner will be one for the win. Now, today's dish will be dredged in garlic butter. My sister and I both love this ingredient. It's versatile and if you use the right amount, it gives great flavor to the dish. Sometimes, it can be a bit strong, but in other cases, if paired right, can lend it's aroma and flavors to the other ingredients in the dish. Okay, now I know I'm babbling on about two ingredients, but what can I say? I am in a chatty mood today. So, to prevent myself from further babbling, I must request that we hop on over to the kitchen and get ready to make an amazing dish that everyone will enjoy!


Garlic Cheddar Chicken


You will need:


  • 1/2 cup butter
  • 4 cloves garlic, minced
  • 3/4 cup dry bread crumbs
  • 1/2 cup freshly grated Parmesan cheese
  • 1.5 cups shredded Cheddar cheese
  • 1/4 teaspoon dried parsley
  • 1/4 teaspoon dried oregano
  • 1/4 teaspoon ground black pepper
  • 1/8 teaspoon salt
  • 8 skinless, boneless chicken breast halves, pounded thin  


Ready?


  1. Preheat the oven to 350 degrees.
  2. Melt the butter in a saucepan over low heat, and cook the garlic until tender, about 5 minutes.
  3. In a shallow bowl, mix the bread crumbs, Parmesan cheese, Cheddar cheese, parsley, oregano, pepper, and salt.
  4. Dip each chicken breast in the garlic butter to coat, then press into the bread crumb mixture.
  5. Arrange the coated chicken breasts in a 9x13 inch baking dish.
  6. Drizzle with any remaining butter and top with any remaining bread crumb mixture.
  7. Bake for 30 minutes, or until the chicken is no longer pink and the juices run clear.
  8. Enjoy!  


I hope everyone enjoys this dish. It took less time to hash out how to make the dish than it did for me to ramble on about my joy for said ingredients! Anyway, I'll catch you all on the flip side. Have a great day and happy blogging to all! <3

Tuesday, March 20, 2012

A Spicy New Entry: Chili Potato Burritos

Good afternoon bloggers! Welcome to another spicy edition of Everyday Meals. As always, I'm your hostess, Mandie. Today, I chose a spicy little ditty because I received my regular monthly edition of Maxim in the mail. I opened it up to find a very beautiful, yet spicy picture of Jennifer Love-Hewitt. This inspired me to pick something that would leave a lasting flavor after eating. What better way to do that than with Mexican food? So, enough chatter. Let's get into the kitchen and make us some food! I'll meet you there.


Chili Potato Burritos


You will need:


  • 4 potatoes, peeled and chopped
  • 1 cup shredded Colby-Monterey Jack cheese
  • 2 teaspoons chili powder
  • 1 teaspoon ground cumin
  • 1 clove garlic, minced
  • salt and pepper
  • 8 flour tortillas
  • 1/2 cup red enchilada sauce


Let's do this!


  1. Bring a large pot of salted water to a boil.
  2. Add the potatoes and cook until tender but still firm, about 15 minutes.
  3. Drain, cool, and mash.
  4. Preheat the oven to 350 degrees.
  5. In a medium mixing bowl, combine the mashed potatoes, 3/4 cup cheese, chili powder, cumin, garlic, salt and pepper.
  6. Spoon evenly into the tortillas, and roll up.
  7. Place the rolled tortillas side by side in a 8x8 inch baking pan.
  8. Spread the enchilada sauce evenly over the top, and sprinkle with the remaining cheese.
  9. Bake in the preheated oven 15 minutes, or until cheese is bubbly.
  10. Enjoy! 


Thank you for coming out today to listen to me rambling. Just a note, if you have any problems with what is discussed earlier in this edition, feel free to shoot me a message (the button can be found on the left side of the page) and we can discuss it appropriately. I hope not to lose any viewers over my reading selection. I promise, I DO read the articles inside, not just ogle the pretty pictures. As always, I hope to see you on the flip side. Have a great day and happy blogging to all! <3

Wednesday, March 14, 2012

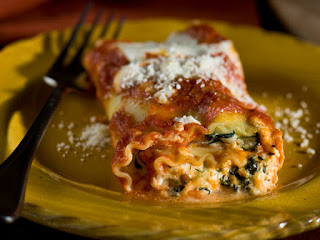
Lasagna Rolls

Good afternoon bloggers! I welcome you with open arms and an empty stomach. Today, we are taking a normal dinner and putting a fun twist on it. Everyone is aware of what lasagna is. I don't feel it necessary to explain about such a classic dish. Well, today we are rolling up our sleeves as well as our pasta! We will be adding a wonderful bechamel sauce to pour over our lasagna rolls, as well as utilizing prosciutto in our dish. Now, I AM going to explain what a bechamel sauce is. Bechamel is known as a white sauce. It's one of the main sauces in French cuisine and is also used in many Italian recipes as well, like lasagna. The sauce is supposedly named after the "marquis de Bechamel", Louis de Bechameil, marquis de Nointel. The sauce was "an improvement upon a similiar, earlier sauce, known as veloute". Bechemel is also the base for a numerous amount of other classic sauces such as Cheedar cheese sauce, Soubise sauce, Creme sauce, Mustard sauce, Mornay sauce, and Nantua sauce. Wow! That's a lot of sauces! Now that you are aware of one of our key ingredients, I will meet everyone back in the kitchen so we can get started on our dish. Meet you there!


Lasagna Rolls


You will need:


For the Sauce:
  • 2 tablespoons unsalted butter
  • 4 teaspoons all-purpose flour
  • 1.25 cups whole milk
  • 1/4 teaspoon salt
  • 1/8 teaspoon ground black pepper
  • Pinch ground nutmeg
For the Lasagna:
  • 1 container whole milk ricotta cheese
  • 1 package frozen chopped spinach, thawed, squeezed dry
  • 1 cup plus 2 tablespoons grated Parmesan
  • 3 ounces thinly sliced prosciutto, chopped
  • 1 large egg, beaten to blend
  • 3/4 teaspoon salt, plus more for salting water
  • 1/2 teaspoon freshly ground black pepper
  • 2 tablespoons olive oil
  • 12 uncooked lasagna noodles
  • 2 cups marinara sauce
  • 1 cup shredded mozzarella


Ready?


  1. To make the sauce: Melt the butter in a heavy medium saucepan over medium-low heat.
  2. Add the flour and whisk for 3 minutes.
  3. Whisk in the milk and increase the heat to medium-high.
  4. Whisk the sauce until it comes to a simmer and is thick and smooth, about 3 minutes.
  5. Whisk the salt, pepper, and nutmeg into the bechamel sauce.
  6. Preheat the oven to 450 degrees.
  7. Whisk the ricotta, spinach, 1 cup Parmesan, prosciutto, egg, salt, and pepper in a medium bowl to blend. Add 2 tablespoons of oil to a large pot of boiling salted water.
  8. Boil the noodles until just tender but still firm to bite, then drain.
  9. Arrange the noodles in a single layer on a baking sheet to prevent them from sticking.
  10. Butter a 13x9x2 inch glass baking dish.
  11. Pour the bechamel sauce over the bottom of the prepared dish.
  12. Lay out 4 lasagna noodles on a work surface, then spread 3 tablespoons of ricotta mixture evenly over each noodle.
  13. Starting at one end, roll each noodle like a jelly roll.
  14. Lay the lasagna rolls seam side down, without touching, atop the bechamel sauce in the dish.
  15. Repeat with the remaining noodles and ricotta mixture.
  16. Spoon 1 cup of marinara sauce over the lasagna rolls.
  17. Sprinkle the mozzarella and remaining 2 tablespoons of Parmesan over the lasagna rolls.
  18. Cover tightly with foil.
  19. Bake until heated through and the sauce bubbles, about 20 minutes.
  20. Uncover and bake until the cheese on top becomes golden, about 15 minutes longer.
  21. Let stand for 10 minutes.
  22. Meanwhile, heat the remaining marinara sauce in a heavy small saucepan over medium heat until hot, and serve alongside.
  23. Enjoy!


Thank you for joining me today. This dish is perfect for any occasion and would pair perfectly with a fruity, red wine such as Sangiovese. Have a great day, enjoy your dinner, and I will catch you on the flip side. Happy blogging to all! <3

Monday, March 12, 2012

Chicken, Red Pepper, and Cashew Stir-Fry

Good afternoon bloggers! Welcome to a brand new edition of Everyday Meals. Today, we are taking on a delicious, simple version of an Asian classic. This dish will be spicy, sweet, salty, and tangy. It will be paired with a very simple rice pilaf. For those of you who are not aware of what pilaf is, you are about to be schooled. Pilaf is when rice is cooked in a seasoned broth. The English term, pilaf, is borrowed from the Turkish and/or Uzbek word: pilav. The word pilav means "shrivelled or bad grain". Depending on where this dish is being served, it may be served with meat and vegetables. Pilaf and it's close relative dishes are common in Caribbean, Middle Eastern, South Asian, Central, East African, and Latin American cuisine. Okay, so now that we have a bit of background on what we will be working with, why don't we get in the kitchen so we can begin making this extremely delicious meal? I'll meet you there!


    Chicken, Red Pepper, and Cashew Stir-Fry


    You will need:


    • 3.75 teaspoons cornstarch, divided
    • 2 tablespoons soy sauce, divided
    • 2 teaspoons dry sherry
    • 1 teaspoon rice wine vinegar
    • 3/4 teaspoon sugar
    • 1/2 teaspoon hot pepper sauce
    • 1 pound chicken breast tenders, cut lengthwise into thin strips
    • 1/2 cup coarsely chopped unsalted cashews
    • 2 tablespoons canola oil
    • 2 cups julienne-cut red bell peppers
    • 1 teaspoon minced garlic
    • 1/2 teaspoon minced peeled fresh ginger
    • 3 tablespoons thinly sliced green onions


    • For the Rice Pilaf:


    • 2 tablespoons water chestnuts, dried and chopped
    • 1/2 teaspoon crushed red pepper
    • 1/4 teaspoon salt
    • 1/4 teaspoon crushed black pepper
    • 1 package frozen white rice


    Ready?


    1. Combine 1 teaspoon cornstarch, 1 tablespoon soy sauce, and the next 4 ingredients (through hot pepper sauce) in a small bowl, then stir with a whisk.
    2. Combine the remaining 2.75 teaspoons cornstarch, remaining 1 tablespoon soy sauce, and chicken in a medium bowl.
    3. Toss well to coat.
    4. Heat a large non-stick skillet over medium-high heat. 
    5. Add the cashews to the pan. 
    6. Cook for 3 minutes or until lightly toasted, stirring frequently, then remove from the pan.
    7. Add oil to a pan, and swirl to coat. 
    8. Add the chicken mixture to the pan, then sauté for 2 minutes or until lightly browned.
    9. Remove the chicken from the pan and place in a bowl. 
    10. Add the bell pepper to the pan and sauté for 2 minutes, stirring occasionally. 
    11. Add the garlic and ginger, and cook for 30 seconds. 
    12. Place the chicken and cornstarch mixture in the pan. 
    13. Cook for 1 minute or until the sauce is slightly thick. 
    14. Sprinkle with cashews and green onions.
    15. To Cook The Rice Pilaf: Cook 1 package of frozen white rice according to package directions. 
    16. Combine the cooked rice, 2 tablespoons drained chopped water chestnuts, 1/2 teaspoon crushed red pepper, 1/4 teaspoon salt, and 1/4 teaspoon freshly ground black pepper.
    17. Serve along with the main dish and enjoy!


    I thank you for taking a little bit of your time to come out and learn a new recipe with me. I can't wait to come back and share another amazing recipe with the lot of you. Stay tuned! Have a great day and happy blogging to all! <3

    Wednesday, March 7, 2012

    A German Classic: Wiener Schnitzel

    Good morning bloggers! Welcome to a brand new entry to Everyday Meals. I've been thinking a bit lately. I know... why would I do such a thing? No, I'm just kidding, but on a serious note, I think Everyday Meals is going to get a name change. Actually, it's going to be shortened to just Everyday Meals. You will also notice that our URL was changed as well. It is now http://everydaymealsforthefamily.bogspot.com.

    So, now onto another note. Today's dish is something that my family has made numerous times before. A few members of my family have lived in Germany before, and this dish is a reminder of their stay. We will be making wiener schnitzel. For those of you who don't know what that is, wiener schnitzel is a thin piece of veal coated in breadcrumbs and then fried. There is another version of this dish that is made with pork, for those who prefer that instead of veal. Did you know that the term Wiener Schnitzel dates back as far as 1862? Wow! Okay, so now that you are aware of what we are working with, let's step into the kitchen so we can start on this scrumptious dish!


    Wiener Schnitzel with Lingonberry Preserves


    You will need:


    • 1/2 cup all-purpose flour
    • 2 eggs, beaten see savings
    • 1.5 cups  plain dry bread crumbs
    • 4 thinly pounded veal cutlets, about 4 ounces each
    • Salt
    • freshly ground white pepper
    • Canola oil, for frying
    • Lingonberry preserves, for serving


    Let's do this!


    1. Put the flour, eggs, and bread crumbs into 3 shallow bowls. Season the veal with salt and white pepper. 
    2. Dredge the cutlets in the flour, then dip in the egg and coat with the bread crumbs. 
    3. Press the cutlets firmly into the bread crumbs to help the crumbs adhere.
    4. In a very large skillet, heat 1/2 inch of oil. 
    5. Add the cutlets and fry over moderately high heat, turning once, until golden brown and cooked through, 2.5 to 3 minutes. 
    6. Drain on paper towels and sprinkle with salt. 
    7. Serve the wiener schnitzel with the lingonberry preserves.


    As you can tell, I spent more time talking about this dish than we did actually preparing it. It's completely worth the rambling though. When you dig into the wiener schnitzel, you can think back to this dishes origins. It will make you feel like you are actually in Germany. Now, have a fabulous day and I will catch you on the flip side. Happy blogging to all! <3

    Tuesday, March 6, 2012

    Snapper Tacos with Chipotle Cream

    Good afternoon bloggers! Today, we are using an ingredient that we have never, I repeat, NEVER used before. I'm super excited to use this ingredient. We will be utilizing red snapper. Red snapper is found in the southeastern Atlantic coast as well as the Gulf of Mexico. It can be located as far Northeast as Massachusetts. Red snapper are  prized food fish. They are caught recreationally, as well as commercially. It is the most common snapper caught in the continental United States. What people think to be red snapper, when sold in the USA, are actually not L. campechanus, but similar species in the same family. Substitution of other types of snapper is common in large chain restaurants due to a better buying price. Okay, well, I'm pretty sure I've filled you in enough on our ingredient, so let's get in the kitchen and make something delicious!


    Snapper Tacos with Chipotle Cream


    You will need:


    • 1/2 cup sour cream
    • 1/8 teaspoon salt
    • 1 canned chipotle chile in adobo sauce, seeded and minced 
    • 1.5 cups chopped onion, divided
    • 1.5 cups chopped tomato, divided
    • 2 tablespoons butter
    • 1 teaspoon ground cumin
    • 1/2 teaspoon salt
    • 1/2 teaspoon ground cinnamon
    • 4 garlic cloves, minced
    • 3 tablespoons chopped fresh cilantro
    • 1 pound red snapper fillets, skinned
    • 1 teaspoon grated lime rind
    • 2 tablespoons fresh lime juice
    • 4 flour tortillas


    Are you ready? Let's go!


    1. Combine the sour cream, 1/8 teaspoon salt, and chile, then set aside. 
    2. Combine 1/2 cup onion and 1/2 cup tomato, then set aside.
    3. Melt the butter in a large nonstick skillet over medium heat. Add 1 cup onion, 1 cup tomato, cumin, 1/2 teaspoon salt, cinnamon, and minced garlic to a pan. 
    4. Cook for 5 minutes, stirring frequently. 
    5. Stir in the cilantro. 
    6. Arrange the fish over the onion mixture in the pan. 
    7. Cover and cook for 3 minutes. 
    8. Turn the fish over, cover and cook for 2 more minutes. Break the fish into chunks. 
    9. Stir in the rind and the juice, then cook 2 minutes. 
    10. Remove from the heat.
    11. Warm the tortillas according to package directions. 
    12. Fill each tortilla with 1/2 cup fish mixture and 1/4 cup reserved onion mixture.
    13. Top each serving with 2 tablespoons of chipotle cream. Fold in half or roll up.
    14. Enjoy!


    Thank you for joining me today. I hope you all had fun using a brand new ingredient. I know that I always enjoy trying something new. Stay tuned for more delicious recipes soon. Have a great day and happy blogging to all! <3

    Friday, March 2, 2012

    Roasted Chicken and Balsamic Bell Peppers

    Good afternoon bloggers! Welcome to a brand new edition of Everyday Meals. I'm your humble hostess, Mandie. Today, we are tackling yet another chicken dish. It seems that chicken conquers everything. There are so many chicken dishes, and yet it seems like we can never make them all. Today, we are roasting our chicken. In about 40 minutes, we will have a meal perfect for any random day. You can serve 4 people total. So grab those cooking utensils and let's make some food!


    Roast Chicken with Balsamic Bell Peppers


    You will need:


    • 3/4 teaspoon salt, divided
    • 3/4 teaspoon fennel seeds, crushed
    • 1/2 teaspoon black pepper, divided
    • 1/4 teaspoon garlic powder
    • 1/4 teaspoon dried oregano
    • 4 skinless, boneless chicken breasts
    • 2 tablespoons olive oil, divided
    • Cooking spray
    • 2 cups thinly sliced red bell pepper
    • 1 cup thinly sliced yellow bell pepper
    • 1/2 cup thinly sliced shallots
    • 1.5 teaspoons chopped fresh rosemary
    • 1 cup chicken broth
    • 1 tablespoon balsamic vinegar


    Ready?


    1. Preheat the oven to 450 degrees.
    2. Heat a large skillet over medium-high heat. 
    3. Combine 1/2 teaspoon salt, fennel seeds, 1/4 teaspoon black pepper, garlic powder, and oregano. 
    4. Brush the chicken with 1.5 teaspoons oil, then sprinkle thespice rub over the chicken. 
    5. Add 1.5 teaspoons oil to the pan. 
    6. Add chicken and cook for 3 minutes or until browned. Turn the chicken over and cook 1 minute. 
    7. Arrange the chicken in an 11 x 7 inch baking dish coated with cooking spray. 
    8. Bake for 10 minutes or until no longer pink in the center.
    9. Heat the remaining olive oil over medium-high heat. 
    10. Add the bell peppers, shallots, and rosemary, then sauté for 3 minutes. 
    11. Stir in the broth, scraping the pan to loosen browned bits. Reduce the heat and simmer for 5 minutes. 
    12. Stir in the vinegar, 1/4 teaspoon salt, and 1/4 teaspoon pepper, then cook for 3 minutes, stirring frequently. 
    13. Serve the bell pepper mixture over chicken.
    14. Enjoy!


    Thank you for joining me once again for another delicious meal. I predict plenty of other chicken dishes in the very near future, so stay tuned! Have a great day and happy blogging to all! <3

    Wednesday, February 29, 2012

    Mardi Gras: Dirty, Dirty Rice and Shrimp!

    Good afternoon bloggers. Welcome to another Mardi Gras themed entry to Everyday Meals! I'm your hostess, Mandie. If you are just joining us, have fun and enjoy your stay. If you are coming back, we're pleased to see you again. Now, I know I've been a bit lax on the entries posted lately. I'm sincerely sorry for that. Life has a way of sweeping people away. I'm here to make it up to you with a couple of amazing recipes that are appropriate for Mardi Gras. They are both very common in Louisiana. In fact, I love both of these recipes (minus a few ingredients)... But fear not, they will find their place on your diningroom table, and they will shine. Now, grab those silly Mardi Gras hats and your aprons, and let's get cooking!


    Andouille Sausage and Shrimp


    You will need:


    • 1 pound large shrimp, uncooked, deviened, peeled
    • 1 tablespoon Creole or Cajun seasoning
    • 2 tablespoons vegetable oil, divided
    • 1 pound andouille sausage, cut crosswise on diagonal into 3/4 inch thick pieces
    • 1 large onion, halved, thinly sliced
    • 1 large red bell pepper, cut into 1/3 inch wide strips
    • 1 tablespoon chopped fresh thyme
    • 1 cup chicken broth
    • 5 tablespoons Creole mustard
    • 2 teaspoons red wine vinegar


    Ready?


    1. Toss the shrimp with Creole seasoning in medium bowl to coat. 
    2. Heat 1 tablespoon oil in a large skillet over high heat. 
    3. Add the sausage pieces, cut side down. 
    4. Cook until browned on both sides, about 5 minutes. Transfer the sausage to a bowl. 
    5. Add the shrimp to the skillet, then cook until browned and just opaque in center, about 3 minutes. 
    6. Transfer to the bowl with the sausage. 
    7. Add the remaining 1 tablespoon oil, onion, bell pepper, and thyme to the skillet. 
    8. Sauté until the vegetables begin to soften, about 5 minutes. 
    9. Add the broth, mustard, and vinegar. 
    10. Stir until the sauce thickens, about 2 minutes. 
    11. Return the sausage and shrimp to the skillet. 
    12. Simmer until heated through, stirring occasionally, about 1 minute. 
    13. Season with salt and pepper.
    14. Enjoy!


    Ready for our next recipe?


    Smoked Sausage and Okra Dirty Rice


    You will need:


    • 4.25 cups water
    • 2.5 cups long-grain white rice
    • 1.5 teaspoons salt
    • 2 tablespoons vegetable oil
    • 1 pound smoked hot pork sausage links, quartered lengthwise and cut crosswise into 1/2 inch pieces
    • 1/2 pound okra, trimmed and thinly sliced crosswise
    • 2 medium onions, chopped
    • 1 medium green bell pepper, chopped
    • 1 medium red bell pepper, chopped
    • 2 large garlic cloves, finely chopped
    • 1.75 cups chicken broth
    • 1/2 teaspoon black pepper
    • 6 scallions, thinly sliced


    1. Bring 4 cups of water to a boil in a 4 quart heavy saucepan, then add the rice and 1/2 teaspoon salt.
    2. Cook, covered tightly, over low heat until the water is absorbed and the rice is tender, about 20 minutes. 
    3. Remove the rice from the heat and let stand, covered and undisturbed for 10 minutes. 
    4. Fluff the rice with a fork and keep covered.
    5. Heat 1 tablespoon oil in a heavy skillet over moderately high heat until hot but not smoking. 
    6. Sauté the sausage in 2 batches, stirring occasionally, until browned, 2 to 3 minutes per batch. 
    7. Transfer the sausage with a slotted spoon to a bowl. 
    8. Add the okra to the skillet and sauté, stirring occasionally, until browned, 2 to 3 minutes. 
    9. Transfer to another bowl.
    10. Heat the remaining tablespoon oil in a skillet over moderately high heat until hot but not smoking.
    11. Sauté the onions and bell peppers, stirring occasionally, until softened and browned, about 5 minutes. 
    12. Add the garlic and sauté, stirring, for 1 minute. 
    13. Combine the okra, broth, black pepper, remaining 1/4 cup water, and remaining teaspoon salt, then simmer, uncovered, stirring occasionally, until slightly thickened and, 10 to 15 minutes. 
    14. Stir in the sausage.
    15. Toss the sausage mixture with the rice and scallions.
    16. Season to taste with salt and pepper.
    17. Enjoy!


    The combination of these two recipes makes for one happy family. I hope you enjoy the rest of your day and I will catch you on the flip side. Happy blogging to all, and Happy Mardi Gras! <3

    Thursday, February 23, 2012

    Mardi Gras: Spicy Bayou Burgers

    Hello and good afternoon bloggers! Welcome to another edition of Everyday Meals. I'm your host, Mandie. Today, we are sticking with the Mardi Gras theme. We will be making a fabulous burger with remoulade. For those of you who aren't aware of what a remoulade is, it's a condiment that was invented in France. Remoulade is ofter mayonnaise or aioli-based. It is similar to tartar sauce, but is often yellow or reddish in color. Remoulades are often served with seafood or meat dishes. Here in the United States, remoulade can be found served with chilled beef tenderloin, often as an hors d'oeuvre.There are a dozen different varieties of remoulade, including a Louisiana remoulade. Well, now that we have a little background on what we will be working with, let's grab our aprons and get cooking!


    Bayou Burgers


    You will need:


    • 1 small onion, chopped
    • 2 tablespoons olive oil
    • 1/4 pound fully cooked andouille sausage link, casing removed, finely chopped
    • 1 teaspoon Creole seasoning
    • 3/4 teaspoon garlic powder, divided
    • 1/4 teaspoon salt
    • 1/4 teaspoon pepper
    • 1 pound ground turkey
    • 1/4 pound Italian turkey sausage link, casing removed
    • 4 slices cheddar cheese
    • 1/2 cup Miracle Whip
    • 2 tablespoons lemon juice
    • 1 tablespoon hot pepper sauce
    • 2 teaspoons sweet pickle relish
    • 1 teaspoon capers, drained
    • 4 kaiser rolls, split
    • 1 tablespoon butter


    Ready?


    1. In a large skillet, saute the onion in oil until tender. 
    2. Add the andouille sausage and cook 1 minute longer. Transfer to a large bowl. 
    3. Stir in the Creole seasoning, 1/4 teaspoon garlic powder, salt and pepper. 
    4. Crumble the turkey and turkey sausage over the mixture and combine well. 
    5. Shape the meat mixture into four patties.
    6. In a large skillet over medium heat, cook the burgers for 5 to 7 minutes on each side or until a meat thermometer reads 165 degrees and the juices run clear. 
    7. Top with cheese, then cover and cook for 1 to 2 minutes or until the cheese is melted.
    8. For the remoulade, in a small bowl, combine the Miracle Whip, lemon juice, pepper sauce, relish and capers. 
    9. Spread the rolls with butter and sprinkle with the remaining garlic powder. 
    10. Broil 4 inches from the heat for 2 to 3 minutes or until lightly browned. 
    11. Serve the burgers on the rolls with the remoulade.
    12. Enjoy!


    I hope those of you who are celebrating Mardi Gras stay safe and those of you who are at home and unable to make the event, have fun with this delicious recipe. I'll catch you all soon for more Mardi Gras recipes. Have a great day and happy blogging to all! <3

    Tuesday, February 21, 2012

    Mardi Gras: Fat Tuesday Cajun Shrimp

    Good afternoon and welcome to a spiffy, Mardi Gras themed edition of Everyday Meals! As a lot of people know, today is Fat Tuesday. Mardi Gras is French for Fat Tuesday, which refers to the last night of eating fatty foods before Lent. In other cities and states, today is referred to as Shrove Tuesday. Shrove is derived from the word shrive, meaning "confess". Well, today, I must confess that the dish we are making is chocked full of Louisiana flavor. It's the perfect meal to kick this Mardi Gras season into high gear! Let's grab those aprons and we'll meet in the kitchen.


    Cajun Shrimp Orecchiette


    You will need:


    • 2 cups uncooked orecchiette pasta
    • 1/3 cup butter
    • 1/2 cup chopped shallots
    • 3 cloves garlic, chopped
    • 1/4 cup chopped green onion
    • 1.5 teaspoons Cajun seasoning
    • 1 teaspoon cracked black pepper
    • 1 cup white wine
    • 1 cup diced plum tomatoes
    • 1 pound medium shrimp, peeled and deveined
    • 1 cup baby spinach


    Ready?


    1. Bring a large pot of lightly salted water to a boil. 
    2. Add the orecchiette pasta, cook for 9 to 11 minutes, until almost al dente, then drain.
    3. Melt butter in a medium skillet over medium heat. 
    4. Stir in the shallots, garlic, and green onion. 
    5. Season with the Cajun seasoning and pepper, and cook about 2 minutes. 
    6. Mix in the wine, tomatoes, and shrimp. 
    7. Continue to cook and stir until the shrimp are opaque. 
    8. Mix in the pasta and spinach, cover, then simmer 3 to 5 minutes, until the spinach has wilted.
    9. Plate and enjoy!


    Thank you for joining me for the beginning of Mardi Gras season. I'll be back with more Mardi Gras recipes soon. Have a great day and happy blogging to all! <3

    Thursday, February 16, 2012

    Lime Soft Tacos and Sausage Calzones! Yum!

    Good afternoon friends! Welcome to a new edition of Everyday Meals. As always, I'm your hostess, Mandie. Today, we are doing a couple of recipes. Both of them are versions of other recipes that I enjoy whole-heartedly. Every couple of weeks, my family loves to order calzones from a Pizza Hut. I know... I should be making them myself, but what can I say? I will say that my family makes a ton of tacos! That's our other recipe for the day. So, unless we get into the kitchen now, I will continue blabbing. Who wants that? Not me! I'll meet you there!


    Sausage and Vegetable Calzones


    You will need:


    • 1/2 pound bulk Italian sausage
    • 1/2 pound sliced fresh mushrooms
    • 1 large red pepper, cut into strips, halved
    • 1 tub Savory Garlic Cooking Creme
    • 1 cup Shredded Mozzarella Cheese
    • 1 can refrigerated pizza crust


    Let's do this!


    1. Heat oven to 400 degrees.
    2. Brown the sausage with the mushrooms and peppers in a large non-stick skillet on medium-high heat. 
    3. Drain the sausage, then return to the skillet. 
    4. Stir in the cooking creme and mozzarella, then remove the skillet from the heat.
    5. Unroll the pizza dough on a clean work surface. 
    6. Pat out into a 15x11 inch rectangle, then cut lengthwise in hal. 
    7. Cut each piece crosswise into thirds. 
    8. Top the dough rectangles with the sausage mixture and fold in half. 
    9. Seal the edges with a fork. 
    10. Place on a baking sheet sprayed with cooking spray.
    11. Bake for 15 minutes or until golden brown.
    12. Enjoy!


    Are you ready to move on? Excellent!


    Lime Chicken Soft Tacos


    You will need:


    • 1.5 pounds skinless, boneless chicken breast meat, cubed
    • 1/8 cup red wine vinegar
    • 1/2 lime, juiced
    • 1 teaspoon white sugar
    • 1/2 teaspoon salt
    • 1/2 teaspoon ground black pepper
    • 2 green onions, chopped
    • 2 cloves garlic, minced
    • 1 teaspoon dried oregano
    • 10 flour tortillas
    • 1 tomato, diced
    • 1/4 cup shredded lettuce
    • 1/4 cup shredded Monterey Jack cheese
    • 1/4 cup salsa


    1. Saute the chicken in a medium saucepan over medium-high heat for about 20 minutes. 
    2. Add the vinegar, lime juice, sugar, salt, pepper, green onion, garlic and oregano. 
    3. Simmer for an extra 10 minutes.
    4. Heat another skillet over medium heat. 
    5. Place a tortilla in the pan, warm one side, and then turn over to heat the other side. 
    6. Repeat with the remaining tortillas. 
    7. Serve the lime chicken mixture in warm tortillas topped with tomato, lettuce, cheese and salsa.
    8. Enjoy!


    Thank you for joining me today for a couple of my favorite recipes. I will be back soon with more awesoe recipes. Enjoy the rest of the day and happy blogging to all! <3

    Tuesday, February 14, 2012

    Love Is In The Air

    Good afternoon and Happy Valentine's Day to all of you wonderful bloggers! Today is a SUPER special day, not just because it's Valentine's Day, but because today marks our 1st Birthday here at Everyday Meals! I started this blog exactly 1 year ago in hopes of spreading the knowledge of wonderful recipes. Well, we've done it! We have reached our 1st year. I pray that we have many more! Now, on the topic of Valentine's Day, I have prepared a delightful menu for dinner. We will surprise our significant others with an appetizer, followed by the main course, and finished with dessert. So, if you are ready to win some hearts, let's strap on those aprons and get in the kitchen!


    Chocolate Fondue


    You will need:


    • 1.5 cups sugar
    • 1.25 cups water
    • 1/4 cup light corn syrup
    • 1 cup baking cocoa
    • 1/2 cup heavy whipping cream
    • 5 ounces semisweet chocolate, chopped
    • Strawberries, banana chunks, apple slices and angel food cake cubes


    Ready?


    1. In a small saucepan, bring the sugar, water and corn syrup to a boil. 
    2. Reduce heat and simmer, uncovered, for 20 minutes, stirring frequently.
    3. In a small bowl, combine the cocoa, cream, and half of the syrup mixture until smooth. 
    4. Return to the pan. 
    5. Bring to a boil, stirring constantly. 
    6. Reduce heat and simmer, uncovered, for 5 minutes. 
    7. Stir in the chopped chocolate until melted. 
    8. Serve warm with fruit and cake for dipping. 
    9. Refrigerate the leftovers.
    10. Enjoy.


    We are now moving on to our main dish...


    Artichoke Beef Steaks


    You will need:


    • 1 jar marinated artichoke hearts
    • 4 beef ribeye steaks 
    • 1/2 teaspoon salt
    • 2 tablespoons butter
    • 1 small onion, sliced and separated into rings
    • 1 garlic clove, minced
    • 1 jar sliced pimientos, drained


    1. Drain the artichokes, reserving 1 tablespoon marinade. Coarsely chop the artichokes and set aside. 
    2. Sprinkle the steaks with salt.
    3. In a large skillet, cook the steaks in butter over medium-high heat for 4 minutes on each side or until the meat reaches desired doneness according to a meat thermometer.
    4. Move the steaks to a serving platter and keep warm.
    5. In the same skillet, saute the onion and garlic in the reserved marinade for 3 minutes. 
    6. Add the artichokes and pimientos and heat through. 
    7. Serve the artichoke mixture on top of the steaks.
    8. Enjoy!


    • medium-rare, 145 degrees
    • medium, 160 degrees
    • well-done, 170 degrees


    Finally, we end this night with some dessert.


    Cherry Meringue


    You will need:


    • 3 egg whites
    • 1/4 teaspoon cream of tartar
    • 3/4 cup sugar

    FOR THE FILLING:

    • 1 package cream cheese, softened
    • 1/4 cup confectioners' sugar
    • 1/2 teaspoon vanilla extract
    • 1 cup heavy whipping cream, whipped
    • 1 can cherry pie filling


    1. Place the egg whites in a small bowl and let stand at room temperature for 30 minutes. 
    2. Add the cream of tartar, then beat on medium speed in a processor until soft peaks form. 
    3. Gradually beat in the sugar, 1 tablespoon at a time, on high until stiff glossy peaks form and the sugar is dissolved.
    4. Spoon the meringue onto a parchment paper-lined baking sheet. 
    5. Using the back of a spoon, form the meringue into a 9 inch heart shape, building up edges slightly.
    6. Bake at 275 degrees for 1.5 hours. 
    7. Turn the oven off and do not open the door. 
    8. Leave the meringue in the oven for 1 hour longer to sit. Remove from the oven and cool completely.
    9. In a small bowl, beat the cream cheese, confectioners' sugar and vanilla until smooth. 
    10. Fold in the whipped cream until the mixture is well blended. 
    11. To serve, place the heart on a serving platter and fill with the cream cheese mixture.
    12. Top with the pie filling.
    13. Enjoy!


    Thank you for joining me for an extra special entry to Everyday Meals. Come back soon for more recipes! Have a lovely Valentine's Day and I'll catch you on the flip side. Happy blogging to all! <3

    Thursday, February 9, 2012

    Traditional Muffuletta

    Hello bloggers! Welcome to a brand new edition of Everyday Meals! Today's meal originated down South. Louisiana, to be exact. The reason I chose this meal is because I did my time living in Louisiana. I can appreciate the fine art of humongous sandwiches. That's exactly what this dish is: a giant sandwich. I know, sandwiches for dinner? Not many people think this qualifies as a dinner meal. I beg to differ, only because this sandwich IS so big. You really won't need anything to accompany it. Just a little note though. This sandwich makes 8 servings! Now, before I spoil what the meal is, let's get into the kitchen, strap on those aprons and make ourselves a HUGE sandwich!


    Muffuletta


    You will need:


    • 1 cup pimento-stuffed green olives, crushed
    • 1/2 cup drained kalamata olives, crushed
    • 2 cloves garlic, minced
    • 1/4 cup roughly chopped pickled cauliflower florets
    • 2 tablespoons drained capers
    • 1 tablespoon chopped celery
    • 1 tablespoon chopped carrot
    • 1/2 cup pepperoncini, drained
    • 1/4 cup marinated cocktail onions
    • 1/2 teaspoon celery seed
    • 1 teaspoon dried oregano
    • 1 teaspoon dried basil
    • 3/4 teaspoon ground black pepper
    • 1/4 cup red wine vinegar
    • 1/2 cup olive oil
    • 1/4 cup canola oil
    • 2 (1 pound) loaves Italian bread
    • 8 ounces thinly sliced Genoa salami
    • 8 ounces thinly sliced cooked ham
    • 8 ounces sliced mortadella
    • 8 ounces sliced mozzarella cheese
    • 8 ounces sliced provolone cheese


    Are you ready?


    1. To Make the Olive Salad: In a medium bowl, combine the green olives, kalamata olives, garlic, cauliflower, capers, celery, carrot, pepperoncini, cocktail onions, celery seed, oregano, basil, black pepper, vinegar, olive oil and canola oil. 
    2. Mix together and transfer the mixture into a glass jar (or other nonreactive container). 
    3. If needed, pour in more oil to cover. 
    4. Cover the jar or container and refrigerate overnight. 
    5. To Make the Sandwiches: Cut the loaves of bread in half horizontally;, then hollow out some of the excess bread to make room for the filling. 
    6. Spread each piece of bread with equal amounts of the olive salad, including oil. 
    7. Layer the bottom half of each loaf with 1/2 of the salami, ham, mortadella, mozzarella and Provolone. 
    8. Place top half on each loaf and cut the sandwich into quarters. 
    9. Serve immediately, or wrap tightly and refrigerate for a few hours. 
    10. Enjoy!


    When you finally see just how big this sandwich is, you can truly appreciate it. This dish is not for the faint of heart. It's a beast. I hope to see you again for more fun recipes. Happy blogging to all! <3

    Tuesday, February 7, 2012

    Slow Cooker Chuck Roast

    Good afternoon bloggers! It's been a few days since I've come around. I was occupied with a beast of a challenge. Sadly, it wasn't a cooking challenge either. Actually, I was writing a business plan. I'm an up and coming photographer . Well, our meal today is a celebration for a job well done! I'm not just talking about my business plan. I'm talking about your kids getting amazing grades in school, or that job promotion you deserved. This celebration is for anyone and everyone. It's a job well done for being the best darn person you can be! Now, let's get into the kitchen and make some food!


    Chuck Roast


    You will need:


    • 1 large onion, sliced
    • 1 medium green pepper, sliced
    • 1 celery rib, chopped
    • 1 boneless beef chuck roast
    • 1 can Italian stewed tomatoes
    • 1/2 cup beef broth
    • 1/2 cup ketchup
    • 3 tablespoons brown sugar
    • 2 tablespoons Worcestershire sauce
    • 4.5 teaspoons prepared mustard
    • 3 garlic cloves, minced
    • 1 tablespoon soy sauce
    • 2 teaspoons pepper
    • 1/4 teaspoon crushed red pepper flakes
    • 3 tablespoons cornstarch
    • 1/4 cup cold water


    Ready?


    1. Place the onion, green pepper and celery in a 5 quart slow cooker, then add the roast. 
    2. In a large bowl, combine the tomatoes, broth, ketchup, brown sugar, Worcestershire sauce, mustard, garlic, soy sauce, pepper and pepper flakes. 
    3. Pour the mixture over the meat. 
    4. Cover and cook on low for 5 to 6 hours or until the meat is tender. 
    5. Remove the meat and vegetables, but keep them warm. 
    6. Skim the fat from the cooking juices if necessary and transfer to a small saucepan. 
    7. Combine the cornstarch and cold water until smooth, then stir into the cooking juices. 
    8. Bring to a boil. 
    9. Cook and stir for 2 minutes or until thickened. 
    10. Serve with the roast.
    11. Enjoy!


    Thank you for joining me today. Thank you for being an amazing person who succeeds in life. I hope you come back and join me for another scrumptious meal. Happy blogging to all! <3

    Friday, February 3, 2012

    Gong Bao Chicken

    Good afternoon bloggers! Welcome to another (delayed) entries to Everyday Meals. I'm your hostess, Mandie. Today, we will be preparing a dish that originally hails from the Sichuan Province of central-western China. The name of today's dish is Gong Bao Chicken. Gong Bao means "palatial guardian". Allegedly, this dish is named Ding Baozhen, a late Qing Dynasty official. Okay, now that I've schooled all of you, why don't we get in the kitchen and make some Gong Bao? Meet you there!


    Gong Bao Chicken


    You will need:


    • 1/3 cup unsalted peanuts
    • 1 pound boneless, skinless chicken breasts, cut into 3/4 inch cubes
    • 1 tablespoon cornstarch
    • 4 tablespoons light soy sauce
    • 2 tablespoons unroasted peanut oil or other neutral oil
    • 1 teaspoon Sichuan peppercorns
    • 2 dried red chiles, roughly chopped or crushed
    • 2 garlic cloves, peeled and very thinly sliced
    • 1 inch knob ginger root, peeled and very thinly sliced
    • 4 scallions, trimmed and roughly chopped
    • Cooked white rice, for serving


    Ready?


    1. Combine the chicken, corn starch, and half of the soy sauce in a small bowl. 
    2. Toss the chicken until it's well coated in the mixture and set aside.
    3. Meanwhile, heat a large, dry skillet or wok over medium heat. 
    4. Add the peanuts and cook, gently tossing occasionally until they're golden brown and fragrant, about 2 to 3 minutes. Transfer to a plate to cool.
    5. Heat the oil in the skillet or wok over medium-high heat until shimmering. 
    6. Add the Sichuan peppercorns and dried chiles, then cook, stirring continuously until the chiles turn a light brown in color.
    7. Turn the heat to high and add the marinated chicken. 
    8. Cook for 2 to 3 minutes, then add the garlic, ginger, scallions, and peanuts. 
    9. Continue cooking until the chicken is cooked through, 1 to 2 minutes more.
    10. Remove from the heat, pour the remaining soy sauce over the chicken, and serve immediately with rice.
    11. Enjoy!


    Thank you for joining me today. I know I've been slack in posting lately, but I was sick all last week. This week, I'm still trying to recover from a harsh cough and sneexing fits. Luckily, I was able to post today. Come back soon for another delicious recipe. I'll catch you on the flip side! Happy blogging to all! <3

    Tuesday, January 31, 2012

    Spicy Garlic Tomato Salmon

    Good afternoon bloggers. Welcome to a brand new entry to Everyday Meals. Today, we will be serving up an amazing fish recipe. Honestly, there's not enough words in the English language to describe this delicious dish. I would have never thought to make my salmon this way... EVER. I know, I know. You are probably wondering what I'm talking about. It's only fair to divulge you and let you in on my secret recipe. So, grab your aprons and let's get into the kitchen so that we can make something amazing!


    Salmon in a Spicy Garlic Tomato Sauce


    You will need:


    • 1 tablespoon caraway seeds
    • 8 tablespoons extra-virgin olive oil, divided
    • 3 tablespoons all-purpose flour
    • 2 salmon fillets
    • 6 cloves garlic, roughly chopped
    • 1 Serrano chili, roughly chopped
    • 2 teaspoons smoked paprika
    • 2 teaspoons ground cumin
    • pinch of cayenne pepper
    • pinch of ground cinnamon
    • 2 tablespoons tomato paste
    • 2 tablespoons fresh lemon juice
    • 2 teaspoons sugar
    • fresh cilantro for garnish


    Ready?


    1. In a small skillet, toast the caraway seeds until they’re slightly darker in color and aromatic in scent, about 2 minutes. 
    2. Let them cool, then grind them in a spice mill or small food processor. 
    3. Set aside.
    4. Toss the flour in a shallow dish. 
    5. Season the salmon with salt and pepper on both sides, then lightly dredge them through the flour, shaking off any excess.
    6. Heat 2 tablespoons oil in a skillet, and sear the salmon until nice and browned, 2 minutes per side. 
    7. Set the salmon on a plate and wipe the skillet clean.
    8. In a food processor, toss in the garlic, Serrano chile, cumin, cayenne, cinnamon, paprika, caraway, and 2 tablespoons oil. 
    9. Blitz until the mixture becomes as paste-y as you can get it.
    10. Back in the cast iron, heat up the last 4 tablespoons oil over medium heat. 
    11. Add the garlic paste and bloom for 30 seconds. 
    12. Add the tomato paste and 1/2 cup water. 
    13. Stir, mix and enjoy the smell. 
    14. Add the sugar and lemon juice, then stir. 
    15. Toss in a pinch of salt and pepper. 
    16. Simmer for 30 more seconds.
    17. Now, add the salmon fillets to the skillet, lower the heat to a light simmer, cover and let it cook for 6 more minutes. 
    18. The salmon will finish cooking as it absorbs the sauce.
    19. Toss in some cilantro and enjoy!


    Thank you for joining me today. I know this wasn't one of the simplest recipes ever, but I couldn't allow you to miss out on this beauty. Come back soon for another awesome edition to EMEF! Happy blogging to all! <3

    Friday, January 27, 2012

    Spicy Pasta? Oh Yeah!

    Hello wonderful people of the interweb! Welcome to Everyday Meals for the Everyday Family. It's obvious that you were looking to try something new, correct? Why else would you be here? Oh, it must be my almighty awesomeness! Nah, I'm just joking. But today, we really are doing something new. It's relatively simple and it tastes extraordinary! If you are ready to have your tastebuds explode with flavor, let's dance our way into our kitchens and make some food! I'll meet you there.


    Please Note: If you have peanut allergies, I advise you NOT to eat this meal. Thank you!


    Spicy Peanut Veggie Pasta


    You will need:


    • 6 tablespoons creamy peanut butter
    • 1/4 cup chicken broth
    • 3 tablespoons rice vinegar
    • 3 tablespoons soy sauce
    • 1.5 tablespoons sugar
    • 1 tablespoon oriental sesame oil
    • 1 tablespoon minced fresh ginger
    • 1/2 teaspoon chili/garlic sauce
    • 8 ounces spaghetti
    • 1 cup matchstick-size carrots
    • 1/2 cup chopped green onions
    • 1/4 cup chopped salted peanuts


    Ready?


    1. Combine the first 8 ingredients in small bowl and whisk to blend. 
    2. Set the dressing aside.
    3. Cook the pasta in a large pot of boiling, salted water until Al Dente, stirring occasionally. 
    4. Drain the pasta, then rinse with cold water and drain again. 
    5. Transfer the pasta to a medium bowl. 
    6. Add the carrots and green onions. 
    7. Pour the dressing over and toss to coat. 
    8. Season the salad with salt and pepper. 
    9. Sprinkle with peanuts and enjoy!


    Once again, thank you for joining me for this new recipe. I appreciate you being here and I sure hope to see you again! Have a fantastic day and I'll catch you on the flip side. Happy blogging to all! <3

    Wednesday, January 25, 2012

    A Scrumptious Twist on Quesadillas

    Good afternoon bloggers and blogerettes! Welcome to a brand new edition of Everyday Meals. Today, we are taking an everyday, ordinary quesadilla and spicing it up with something extraordinary! That something would be Brie. If you aren't aware of what Brie is, it's a soft cheese. It's named after the region in France, where it originated. Brie is a pale, grayish color cheese. There are many types of brie in production. There's plain Brie, herbed Brie, Double Brie, Triple Brie, and Brie made with other types of milk. Did you know that Brie is normally purchased as a full wheel or a segmented wheel? Interesting! Now that you have a little bit of background, let's get in the kitchen and make some food!


    Brie and Brisket Quesadillas


    You will need:


    For the Brisket

    • 3 pounds brisket
    • Salt
    • Ground black pepper
    • 1 tablespoon chili powder
    • 3 cloves garlic, minced
    • 16 ounces Dr. Pepper

    For the Mango Barbecue Sauce

    • 1.5 tablespoons olive oil
    • 1 medium yellow onion, chopped
    • 1/2 cup ketchup
    • 2 tablespoons lemon juice
    • 1.5 tablespoons Worcestershire sauce
    • 1.5 teaspoons Creole mustard
    • Salt
    • Pepper
    • 1/4 cup mango chutney

    For the Quesadillas

    • 8 flour tortillas
    • 8 ounces brie, thinly sliced
    • 1 cup Monterrey jack, shredded
    • olive oil, to brush tortillas
    • cilantro, for garnish


    I know, it's a long list, but it's worth it in the end. I promise!


    1. To make the brisket: Rub the meat with salt, pepper, chili powder, and garlic. 
    2. Place the brisket in the crock-pot and pour the Dr. Pepper over the top. 
    3. Cook on low for 8 hours. 
    4. Remove from the crock-pot and let rest for 15 minutes. 
    5. Slice it against the grain.
    6. To make the barbecue sauce: Heat olive oil in a 2-quart sauce pan. 
    7. Saute the onions for 5 minutes. 
    8. Add garlic and cook until fragrant. 
    9. Stir in the remaining ingredients and simmer for 5 minutes. 
    10. Transfer to a blender or food processor and run until smooth.
    11. To assemble the quesadillas: Heat a griddle or large pan over medium-high heat. 
    12. Lay out the tortillas. 
    13. Divide the meat, brie, and Monterrey jack between the tortillas, placing the meat and cheese on half of the tortilla.
    14. Top with a spoonful or two of barbecue sauce and fold the other half over. 
    15. Place on the heated grill, brushing the tortilla with oil to prevent sticking. 
    16. Cook until the bottom is crisp, then flip over and heat the other side. 
    17. Remove from heat and slice into thirds. 
    18. Serve with extra barbecue sauce.
    19. Enjoy!


    Thank you for joining me today. I hope you all have a wonderful afternoon. Enjoy this meal and come back soon for another wonderful recipe! Happy blogging to all! <3

    Monday, January 23, 2012

    Carne Guisada

    Good morning bloggers! Today is a brand new day and might I add, it's a wonderful day! There's nothing like waking up on a Monday morning in Texas. The air is crisp and a bit chilly. Grab a cup of coffee (or tea) and join me for a new recipe; one we haven't tackled before. If you live in the Southern states, you have heard of or made carne guisada before. There's no escaping this wonderfully mastered dish down South. It's like trying to avoid snow up North. It's impossible. Your mission, should you choose to accept is to accompany me in the kitchen to perfect this recipe... Okay, great! Let's go!


    Carne Guisada


    You will need:


    • 2 teaspoon olive oil
    • 1 cup scallions, chopped
    • 3 cloves garlic, minced
    • 2 small tomatoes, chopped
    • 2 tablespoons cilantro, minced
    • 1.5 pounds choice round beef stew, cut into small chunks 
    • 1/3 cup light beer
    • 1/3 cup water
    • 1/2 teaspoon cumin  
    • 1/4 teaspoon adobo
    • 1/2 teaspoon achiote
    • 1 bay leaf
    • salt to taste
    • 10 ounces baby red potatoes, halved


    Ready?


    1. In a large dutch oven or heavy pot, heat oil over medium heat. 
    2. Add scallions and garlic and sauté for about 2 to 3 minutes, then add the tomatoes, cilantro and a pinch of salt. 
    3. Cook for another 2 minutes, stirring. 
    4. Add the beef to the pot along with the beer, water, cumin, adobo, achiote, bay leaf and salt. 
    5. Cover and simmer on low heat 1.5 hours. 
    6. Test to make sure the beef is tender, if not cook another 15 minutes. 
    7. Add the potatoes and cook until soft, about 20 minutes depending on the size.
    8. Serve con your favorite arroz  o tortillas y enjoy!


    I thank you for joining me today. Enjoy your carne guisada and come back soon for more recipes. Oh, if you were wondering what my last sentence was of the recipe, it means "Serve with your favorite rice or tortillas and enjoy!" (^_^) Happy blogging to all! <3