Wednesday, August 31, 2011

Taking It Easy


Good evening bloggers! Welcome to another edition of Everyday Meals. Tonight, I've decided to take it fairly easy on everyone. Lately, we've all been working our butts off making hearty Cajun Meals and what not. I figured, why not something respectably easy, like a pasta salad? Not to mention, it's Summer and it's hot and no one wants to slave over a hot stove all night. So, let's grab those aprons and get prepping!


Sesame Pasta Chicken Salad


You will need:


  • 1/4 cup sesame seeds
  • 1 (16 ounce) package bow tie pasta
  • 1/2 cup vegetable oil
  • 1/3 cup light soy sauce
  • 1/3 cup rice vinegar
  • 1 teaspoon sesame oil
  • 3 tablespoons white sugar
  • 1/2 teaspoon ground ginger
  • 1/4 teaspoon ground black pepper
  • 3 cups shredded, cooked chicken breast meat
  • 1/3 cup chopped fresh cilantro
  • 1/3 cup chopped green onion


  1. Heat a skillet over medium-high heat. 
  2. Add the sesame seeds, and cook stirring frequently until lightly toasted. 
  3. Remove from the heat and set aside. 
  4. Bring a large pot of lightly salted water to a boil. 
  5. Add the pasta, and cook for 8 to 10 minutes, or until al dente. 
  6. Drain the pasta and rinse under cold water until cool. Transfer the pasta to a large bowl. 
  7. In a jar with a tight-fitting lid, combine the vegetable oil, soy sauce, vinegar, sesame oil, sugar, sesame seeds, ginger, and pepper. 
  8. Shake well. 
  9. Pour the sesame dressing over the pasta, and toss to coat evenly. 
  10. Gently mix in the chicken, cilantro, and green onions.
  11. Enjoy!


I hope you all have an easy night. Don't stress too much and I will catch you all on the flip side. Enjoy this peaceful song and video below. Happy blogging to all! <3


Tuesday, August 30, 2011

Caribbean Flavors


Good evening bloggers! Welcome to a new edition of Everyday Meals. I'm your wonderful host, Mandie. Today, we are taking a dip into the Caribbean for some amazing grilled chicken and rice. There's definitely more to it than just this, but I prefer to leave you in suspense until you catch the name and ingredients. Anywho, instead of continueing to chat, why don't we get cooking? Let's do this thing!


Caribbean Chicken with Pineapple-Cilantro Rice


You will need:


  • 1 tablespoon light brown sugar
  • 1 teaspoon ground black pepper
  • 1 teaspoon dried thyme
  • 1 teaspoon ground cumin
  • 1 teaspoon garlic salt
  • 1 teaspoon paprika
  • 1/2 teaspoon chili powder
  • 1/2 teaspoon ground nutmeg
  • 4 skinless, boneless chicken breast halves
  • 1 cup uncooked white rice
  • 1.5 cups water
  • 1 (8 ounce) can sliced pineapple in juice, drained, divided
  • 2 tablespoons chopped fresh cilantro
  • 1 teaspoon olive oil
  • 1 pinch garlic salt
  • 1 pinch ground black pepper


  1. Preheat the oven to 350 degrees. 
  2. Mix together the light brown sugar, 1 teaspoon of black pepper, thyme, cumin, 1 teaspoon of garlic salt, paprika, chili powder, and nutmeg in a bowl until thoroughly combined. 
  3. Rub both sides of chicken breasts with the spice mixture, and place into a 9x9 inch baking dish. 
  4. Sprinkle any remaining seasoning mix on top of chicken, if desired. 
  5. Bake in the preheated oven until the chicken is lightly browned, no longer pink inside, and the juices run clear, about 30 minutes. 
  6. An instant-read meat thermometer inserted into the thickest part of a chicken breast should read at least 160 degrees. 
  7. While the chicken is baking, bring the rice and water to a boil in a saucepan over high heat. 
  8. Reduce heat to medium-low, cover, and simmer until the rice is tender, and the liquid has been absorbed, 20 to 25 minutes. 
  9. Chop half the pineapple slices. 
  10. Mix the chopped pineapple, cilantro, and olive oil into the cooked rice, and season to taste with a pinch or two of garlic salt and black pepper. 
  11. Fluff the rice up with a fork, and transfer to a serving platter. 
  12. Serve with the baked chicken, topped with remaining pineapple slices.


I hope you all have a wonderful evening. I am not including a video tonight. My brain cannot cope with having to search for something that'll kill brain cells in 2 seconds. LOL. But I leave you with warm thoughts and the need for more recipes tomorrow. Happy blogging and I'll catch you on the flip side!

Sunday, August 28, 2011

Cajun Week: Finale


Good afternoon bloggers! I would like to start out by saying welcome to another Cajun entry to Everyday meals. Seeing how I was absent yesterday, we will be preparing two (2) recipes today to finish off our Cajun Week. I hope you have plenty of time and a hearty appitite! Let's get started!


Downhome Stuffed Trout


You will need:


  • 16 speckled trout fillets 
  • 1/4 cup melted butter 

For the Stuffing 

  • 1/2 cup butter 
  • 1/2 cup chopped onion 
  • 1/2 cup chopped green onions 
  • 1 pound crab meat, picked to remove all shells 
  • 1/4 pound shrimp, peeled 
  • 3/4 cup bread crumbs 
  • Salt and red pepper to taste 

For the Sauce 

  • 1/2 cup butter 
  • 1/4 cup chopped celery 
  • 1/4 cup chopped green onions 
  • 1/4 cup chopped onions 
  • 2 cloves garlic, minced 
  • 3/4 pound shrimp 
  • 1/4 pound fresh mushrooms, sliced 
  • 1/4 cup white wine


  1. To prepare the stuffing, saute the onions and celery in butter. 
  2. Add the crab meat and shrimp, then simmer, uncovered, until the shrimp is cooked (about 5 to 8 minutes). 
  3. Add bread crumbs to thicken the mixture. 
  4. Add salt and red pepper to taste. 
  5. Butter two 9 x 13 inch baking dishes. 
  6. Preheat the oven to 350 degrees. 
  7. Place 4 trout fillets in each baking dish and top with a scoop of stuffing, followed by another trout fillet, then drizzle melted butter on top. 
  8. Bake for 30 to 40 minutes until the fish is done. 
  9. While the fish is baking, prepare the sauce by melting butter and sauteing celery, green onions, onions and garlic. 
  10. Add the shrimp and simmer until pink. 
  11. Add the mushrooms and white wine and simmer for 3 to 5 minutes. 
  12. Arrange the trout on a serving platter and pour sauce over the fish. 
  13. Some of the sauce may be reserved and served in a gravy boat.
  14. Enjoy!


Ready for our next recipe? Great!


Catfish Pecan Meuniere


You will need:


  • 6 catfish filets
  • 3 cups roasted pecans 
  • 1 cup fresh bread crumbs 
  • 1 cup seasoned flour (season with salt, black and red peppers) 
  • 3 eggs 
  • 1/2 cup milk 
  • Creole seasoning blend 
  • Olive oil 
  • Chopped parsley

For the Meuniere Sauce:

  • 3 lemons, peeled and quartered 
  • 7 tablespoons Worcestershire sauce 
  • 3 tablespoons Crystal hot sauce 
  • 1/2 cup heavy whipping cream 
  • 2 tablespoons unsalted butter, room temperature 
  • 1/4 teaspoon salt 
  • 1/4 teaspoon white pepper


  1. To Prepare the meuniere sauce: In a large sauté pan combine the lemons, hot sauce, Worcestershire sauce and whipping cream. 
  2. Blend with a wire whisk over medium heat, stirring constantly, for 3 4 minutes. 
  3. As you stir, press gently on the lemon quarters to slowly release the juices. 
  4. Slowly add the butter by pinching off a little bit at a time and squeezing it through your fingers into the sauce pan, stirring constantly. 
  5. As you add the last of the butter, remove from heat and continue to stir. 
  6. Strain through a fine strainer and keep warm.
  7. To Prepare the catfish filets: Trim the fat and any rough edges off the catfish filets. 
  8. Lightly season with Creole seasoning and place in the refrigerator.
  9. Grind 2.5 cups of the pecans and the bread crumbs together in a food processor. 
  10. Place in a shallow pan or plate and set aside.
  11. In a medium-sized bowl, make an egg wash by combining the 3 beaten eggs and 1/2 cup of milk. 
  12. Set up a standard breading station on your table or counter top. 
  13. Bread filets by first coating them with the seasoned flour, then placing each in the egg wash and then finally pressing each into the ground pecan/bread crumb mixture, making sure the entire filet is coated well. 
  14. Using a large skillet or sauté pan, cover the bottom with olive oil, and heat. 
  15. Gently place the fish into the hot oil. 
  16. Cook until lightly brown, turn fish and repeat. 
  17. If fish isn't cooked all the way through, place in a shallow baking pan in a 450 degree oven for about 5 minutes.
  18. Place one filet on the plate, drizzle with meuniere sauce, and top with the rest of the roasted pecans, and sprinkle with chopped parsley.
  19. Enjoy!


I hope you all have a fun-filled day. Thank you for joining me for Cajun week. Next week, we are taking a break and doing individual recipes again. I will catch you all on the flip side. Happy blogging and enjoy this youtube video below! <3


Friday, August 26, 2011

Cajun Week: Meatloaf with Sweet Pepper Sauce


Good afternoon bloggers! Welcome to another Cajun entry to Everyday Meals. I'm your host, Mandie. Today, we are taking a look at Cajun meatloaf! The difference between this meatloaf and normal meatloaf would be the variety of spicy ingredients and sauces added on and to the meal itself. Cajuns pride themselves on their spiciness. It's what makes them, well, them. Any who... I'm sure you are tired of my rabbit trails, so let's get cooking!


Cajun Meat Loaf with Sweet Pepper Sauce


You will need:


  • 1 tablespoon oil
  • 1 cup finely chopped sweet red pepper
  • 1/2 cup finely chopped sweet green pepper
  • 1/2 cup finely chopped onion
  • 1/2 teaspoon salt
  • 4 slices white bread, torn
  • 1/2 cup milk
  • 1 pound ground beef
  • 1/2 cup dried bread crumbs
  • 1/2 cup ketchup
  • 1 egg
  • 1 teaspoon hot pepper sauce

For the Sweet Pepper Sauce:

  • 1 tablespoon oil
  • 1 cup diced sweet red pepper
  • 1 cup diced sweet green pepper
  • 1/2 cup finely chopped onion
  • 1/4 cup water
  • 1/2 teaspoon salt
  • 1/4 cup cider vinegar
  • 1/4 cup packed brown sugar
  • 1 teaspoon whole mustard seeds


I didn't run you off with this massive grocery list, did I? Okay, good.


  1. To Make the Meatloaf: Heat oil in a large skillet over medium-high heat. 
  2. Add the red pepper, green pepper, onion and salt. 
  3. Cover and cook over low heat until very tender, about 8 minutes. 
  4. Remove the vegetables from the heat and cool slightly.
  5. Heat the oven to 350 degrees. 
  6. Grease a 9 x 5 x 3 inch loaf pan.
  7. Combine bread and milk in large bowl, then let stand for 5 minutes to soften. 
  8. Add the beef, crumbs, ketchup, egg, hot pepper sauce and sweet red pepper mixture, then toss gently to coat. Spoon and pat the mixture into the prepared loaf pan. Bake for 1 hour then let stand for 15 minutes before serving.
  9. To Make the Sweet Pepper Sauce: Heat a large skillet over medium-high heat. 
  10. Add the red pepper, green pepper, onion, water and salt. 
  11. Cook, stirring occasionally, over medium heat until very tender, about 8 minutes.
  12. Stir in the cider vinegar, brown sugar and mustard seeds and cook over medium-high heat until most of the liquid has evaporated and sauce is thickened, about 8 minutes.
  13. Top each serving with a dollop of Sweet Pepper Sauce and serve.
  14. Enjoy!


I hope you have a great day chock full of spicey goodness! Here's a video to brighten your day up a bit. I will catch you on the flip side. Happy blogging! <3


Thursday, August 25, 2011

Cajun Week: Smothered 7 Steak


Good afternoon bloggers! Welcome to another very Cajun installment of Everyday Meals. Today, we are trying our hand at a dish called "Smothered 7 Steak". This dish is appropriately named due to the shape of the bone and the cut of the meat. You can have this dish with breakfast, but you would normally find it with grillades (a recipe for pork and grits). Okay, enough of this culinary lesson and background. Let's go cook!


Smothered 7 Steak


You will need:


  • 2 seven steaks
  • 1 large onion sliced in rings
  • 1 medium bell pepper
  • 1/2 cup canola or olive oil
  • 2 teaspoons salt
  • 1 teaspoon black pepper
  • 1/2 teaspoon red pepper or cayenne
  • 1 teaspoon garlic powder
  • 1 teaspoon onion powder
  • 2 pods garlic
  • 1.5 cups or more beef stock


Let's do this! Whoo!


  1. Wipe the steaks dry and season the seven steaks with salt, black pepper,cayenne, garlic and onion powder or use any type Cajun seasoning combination. 
  2. In a cast iron skillet, heat the oil over medium-high heat, add the steaks and brown the meat on both sides. Remove the meat from the pan after browning, then add the sliced onions, bell pepper and garlic. 
  3. Sauté until the onions are soft and start to caramelize. 
  4. Return the steaks to the skillet and the add beef stock or water. 
  5. There should be enough stock or water to cover the meat mixture. 
  6. Stir to blend and then bring the mixture to a boil. Reduce the heat to simmer. 
  7. Cover and cook approximately one hour or until fork tender. 
  8. The water will reduce and the result will be a light brown onion-y gravy. 
  9. If the gravy is too thin, put the lid partially on the skillet and allow some steam to escape.
  10. Enjoy!


I hope you all have a quiet day with the kiddos at school. Take some "you time" and enjoy yourselves. I will leave you all with a video to ensure a happy day and I will catch you all on the flip side. Happy blogging to all! <3


Wednesday, August 24, 2011

Cajun Week: Cajun Fried Chicken Burgers


Good evening bloggers! Today we are going to conquer another Cajun recipe. We will be utilizing chicken today. You don't normally think of Cajun burgers when you think of typical Cajun food, but that is exactly what is on our menu today! Let's grab those handy, dandy aprons, that special spatula and the "kiss the cook" apron and let's get cooking!


Cajun Fried Chicken Burgers


You will need:


  • 1 egg white
  • 1 small clove garlic or 1 teaspoon ground garlic
  • 1 teaspoon buttermilk or 1 teaspoon 2% milk
  • 1 teaspoon salt
  • 1 teaspoon pepper 
  • 1 teaspoon onion powder
  • 1 tablespoon Tony Chachere's Seasoning
  • 1.25 pound ground chicken, white, dark or mixed
  • 1/2 cups bread crumbs
  • 1 cup oil


Ready? Let's do this thing!


  1. Preheat the oven to 300 degrees. 
  2. Combine the egg whites, garlic and milk in a bowl. 
  3. In another bowl, combine the chicken, salt, pepper, Tony's and 1/2 cup bread crumbs. 
  4. Lightly mix those together, then add the egg and milk combo. 
  5. Continue to lightly mix until a ball is formed. 
  6. Next, form patties out of mixture to make 4 to 8 burgers. 
  7. Roll or coat these in 1 cup of the bread crumbs. 
  8. Place them in the refrigerator for 30 minutes. 
  9. Place 1 cup of oil in skillet and heat until hot. 
  10. Place the burgers in the skillet for 1.5 minutes; 45 seconds on each side. Next place those burgers on cookie tray and place in the 300 degree oven for 13 to 14 minutes.
  11. Enjoy!


I hope you all had fun mastering this cajun burger. I will catch you all on the flip side. Enjoy this video. It's sure to brighten your day even more than this awesome recipe did! Happy blogging to all! <3


Tuesday, August 23, 2011

Cajun Week: Crawfish Pie


Good afternoon bloggers! Welcome to another very Cajun entry of Everyday Meals. Today, we are going to tackle what Southerners like to call "Crawfish Pie". This is a Cajun staple in Louisiana. It's one of the tougher dished to perfect and it does take time and effort to get it just right. I'm sure yours will come out wonderfully! Let's get in the kitchen and get cooking!


Crawfish Pie


You will need:


  • 1/2 stick of real butter 
  • 1/2 cup of chopped green bellpeppers 
  • 1/2 cup of chopped celery 
  • 2 teaspoons of salt 
  • 1/2 teaspoon of red pepper 
  • 1/2 teaspoon of black pepper 
  • 1/2 cup of canned tomatoes, chopped 
  • 1 pound of fresh crawfish tails 
  • 2 teaspoons of chopped parsely 
  • 2 tablespoons of flour 
  • 1 cup of water 
  • 1 pie crust


Still with me? Cool!


  1. Heat the oven to 400 degrees. 
  2. In a large skillet, melt the butter over a medium heat. 
  3. To the melted butter, add the onions, celery, bell pepper, red pepper, salt, and black pepper. 
  4. Cook for about 10 minutes until the onions are a golden color. 
  5. Add the tomatoes and cook for another 7 minutes, stirring ocasionally. 
  6. Add the parsley and the crawfish, and cook for another 5 minutes. 
  7. In a seperate bowl, dissolve the flour into the water. 
  8. Add this mixture to the skillet and stir for about 4 minutes until it thickens. 
  9. Pour the ingredients that are in the skillet into a cool bowl. 
  10. Allow to cool for at least 30 minutes. 
  11. Place the pie crust onto a 9 inch pie pan, then crimp the edges. 
  12. Pour the mixture from the cool bowl into the pie pan. 
  13. Place the pie on a baking sheet and into the oven. 
  14. Cook in the oven for about 45 minutes, or until the edges are golden brown.
  15. Enjoy!


I hope you all have a wonderful day. Enjoy this Cajun meal and think of Everyday Meals when you share this recipe with your friends and family. Happy blogging to all and enjoy this video below (for anyone that watches Family Guy, you WILL enjoy this...)! Catch you on the flip side, <3


Monday, August 22, 2011

Cajun Week!


Good evening bloggers! As you all noticed, two days ago, our breakfast week came to a lovely end. I tooka day off to gain my marbles back and decide what to do for this upcoming week. With the help of my friends, I have decided to do Cajun Week. To kick start this week off in good taste, we will be doing one of many version of a jambalaya. This version of jambalaya is Cajun, therefore, comes from Louisiana's low-lying swamp country where the items are readily available for the taking. This version is also known as "brown jambalaya". Well, now that we know a little more about this dish, let's get cooking!


Shrimp Jambalaya


You will need:


  • 4 tablespoons butter
  • 2 tablespoons all-purpose flour
  • 3 onions, chopped
  • 1 clove garlic, chopped
  • 1/4 pound ham, cut into strips
  • 2 cups canned tomatoes
  • 2 pounds shelled, deveined shrimp
  • 3 cups water, broth or fish stock
  • 2 cups rice
  • Salt and pepper to taste
  • Dash of Tabasco sauce


Still with me?


  1. Melt the butter in a large Dutch oven and blend in the flour.
  2. Add the onions, garlic and ham and cook just until the onion becomes transparent.
  3. Add the tomatoes and cook them down for a few minutes.
  4. Add salt and pepper to taste.
  5. Wash the rice well and add to the sauce; add more water, if necessary.
  6. Cook until the rice is done.
  7. Add the shrimp and cook on low heat for 5 to 10 minutes, until shrimp looks opaque. 
  8. Do not overcook shrimp, or they will become tough.
  9. Watch closely as the rice cooks, to be sure there is enough liquid to keep from burning. 
  10. Add water, tomato juice or V-8 if necessary.
  11. Enjoy!


I hope you all have a splendid evening. Come back tomorrow for another Cajun recipe sure to delight your stomaches and mouths. In the mean time, check out this video, also sure to make your day. Happy blogging to all!


Saturday, August 20, 2011

Ending Breakfast Week with a Bang!


Good evening bloggers! Welcome to our final day of Breakfast week here at Everyday Meals. I want to finish this week off Texas style. And nothing is more Texan or breakfast-y than Huevos Rancheros. This dish was basically Ranch fare. There are many varieties of this across the Americas and as far as Mexico. Well, I'm not in too much of a mood to give a history lesson. Let's go prepare breakfast! Whoo!


Huevos Rancheros


You will need:


  • 2 tablespoons cooking oil
  • 6 tortillas
  • 2 cup onion, chopped
  • 1 clove garlic, minced
  • 3 large tomatoes, peeled, cored, and chopped
  • 1 can 4 ounces green chili peppers, rinsed, seeded, and chopped
  • 1/4 teaspoon salt
  • 1 tablespoon cooking oil
  • 6 eggs
  • 1 cup shredded Monterrey jack cheese


Still there?


  1. In small skillet heat 2 tablespoons oil. 
  2. Holding the tortillas with tongs, dip one at a time in hot oil for 10 seconds or until limp. 
  3. Line a 10x6x2 baking dish with tortillas, and keep warm. 
  4. In the same skillet cook the onion and garlic until tender but not brown (add more oil if necessary). 
  5. Stir in the tomatoes, green chili peppers, and salt. 
  6. Simmer, uncovered, for 10 minutes then spoon over tortillas. 
  7. In a large skillet heat 1 tablespoon oil. 
  8. Carefully break the eggs into the skillet and sprinkle with salt and pepper. When the whites are set and edges cooked, add 1 tablespoon water. 
  9. Cover the skillet and cook the eggs to desired doneness. 
  10. Carefully arrange the cooked eggs over the sauce in the baking dish, then sprinkle with cheese. 
  11. Place under the broiler for 1 to 2 minutes or until the cheese melts. 
  12. Serve at once.
  13. Enjoy!


You all have a great night and this upcoming week, we will be doing something totally new. I'm not sure what yet, but I have all night to figure it out! Until tomorrow, I bid you adeau and happy blogging! P.S., check out the video below!


Friday, August 19, 2011

Frittatas! Whoo!


Good evening bloggers. I decided to take a tour of American breakfast and I stumbled upon a little ditty from Kennebunkport, ME. This was taken from an Inn called the Captain Fairfield Inn. I've never been there personally, but this recipe thrilled my tastebuds. It does not have meat in it, but it's chocked full of veggies and yummy cheese. So, let's grab our aprons and get cooking!


Skillet Frittatas with Seasonal Vegetables


You will need:


  • 1 red sweet pepper
  • 1 green bell pepper
  • 1 yellow or orange sweet pepper
  • 1 summer squash (medium)
  • 1 zucchini (medium)
  • 1 Spanish onion, coarsely chopped
  • 3 ripe Italian plum tomatoes
  • 1 clove fresh garlic, minced
  • Sprigs of fresh parsley
  • 2 Tablespoons olive oil
  • oregano
  • thyme
  • 12 eggs
  • 1 cup sharp cheddar cheese
  • freshly ground black pepper


Ready?


  1. Cut the peppers, summer squash, and zucchini into thin 1/2 inch strips. 
  2. Dice the onion and tomatoes into 1/4 inch cubes. 
  3. Peel and finely mince the garlic, then finely chop the parsley. 
  4. Heat a medium size pot with olive oil over medium heat, lightly saute the chopped garlic and onion until translucent. 
  5. Add the freshly cut vegetables, but do not add the tomatoes. 
  6. Add oregano and thyme, and gently toss. 
  7. Keep the vegetables firm and do not overcook.
  8. Remove from the heat and add the tomatoes, but do not stir. 
  9. Pour the beaten eggs (use 2 beaten eggs for each individual serving) into a heated and lightly buttered skillet.
  10. Once the eggs begin to set, add the vegetables to the top,but do not stir. Add the parsley and then top with cheddar cheese and black pepper and salt.
  11. Cover and cook over low heat until the cheese is melted. 
  12. Loosen and slide onto warm plate.  
  13. Serve with French bread cut into triangular thirds and a sprig of fresh parsley. 
  14. Enjoy!


I hope you all enjoy the rest of your day. Stay cool (because it's soooo hot outside. I've been out once already and I disliked it, a lot.) I'll catch you all on the flip side! Oh, enjoy this little video. It'll brighten your day. <3


Thursday, August 18, 2011

A Texas-Sized Breakfast


Good afternoon bloggers! Today, I woke up hungrier than usual. When I'm this hungry, I request a larger than life breakfast. However, no one cooks for me, so I'm really asking myself. Well, I figured since I was this hungry, that you would be too. What better way to kick off the day other than Texas style! We like everything bigger than big here in this state, so it's my treat to you all a Texas-sized recipe! Let's go!


Big Ole Tex-Mex Burrito


You will need:


For the Sauce

  • 1 pound tomatillos, husked, rinsed and quartered
  • 1 medium Vidalia onion, quartered
  • 1 jalapeno pepper, halved
  • 2 tablespoons extra-virgin olive oil
  • Kosher salt and freshly ground black pepper
  • 1 small bunch fresh cilantro

For the Omelets

  • 1 link Mexican chorizo casing removed
  • 1/2 teaspoon ground cumin
  • Pinch of cayenne pepper
  • Pinch of paprika
  • 1 cup mixed canned beans, drained and rinsed
  • Kosher salt and freshly
  • ground black pepper
  • 1 green bell pepper, chopped
  • 8 large eggs, beaten
  • 1 tablespoon milk
  • 1 tablespoon unsalted butter
  • 1/2 cup shredded pepper jack cheese
  • Mexican crema or sour cream, thinned with half-and-half, for garnish
  • 1 plum tomato, seeded and chopped, for garnish


I didn't scare you off with the giant shopping list, did I? I hope not!


  1. Make the sauce: Preheat the oven to 400 degrees . 
  2. Toss the tomatillos, onion, jalapeno and olive oil on a baking sheet and season with salt and black pepper. 
  3. Roast until browned, about 45 minutes. 
  4. Puree in a blender with the cilantro, thinning with water as needed, then season with salt.
  5. Meanwhile, prepare the omelet: Cook the chorizo in a large nonstick skillet over medium-high heat until crisp, breaking it up, 4 to 5 minutes. 
  6. Transfer to a paper-towel-lined plate. 
  7. Stir the cumin, cayenne and paprika into the drippings in the skillet. 
  8. Add the beans and saute until soft, about 5 minutes. 
  9. Season with salt and black pepper, then add the bell pepper and cook 1 to 2 more minutes and transfer to a bowl.
  10. Whisk the eggs and milk in another bowl. 
  11. Wipe out the skillet, reduce the heat to medium and add 1/2 tablespoon butter. 
  12. Pour half of the egg mixture into the skillet and cook until the center is no longer liquid, loosening the edges with a rubber spatula and tilting the skillet to let the uncooked egg run underneath. 
  13. Shake the pan to loosen the omelet, then spoon half of the bean mixture, chorizo and cheese down the center. 
  14. Fold in both sides to cover the filling, then flip the omelet so it is seam-side down and cook 1 more minute. 
  15. Repeat with the remaining butter, egg mixture and fillings to make another omelet. 
  16. Top with the tomatillo sauce and garnish with the crema and tomato.
  17. Enjoy!


I hope you all have a splendid day! Try and stay cool and while you're at it, laugh your butt off at the video below. Happy blogging to all!


Wednesday, August 17, 2011

Breakfast Sausage Casserole!


Good evening bloggers! We have a hidden jem here tonight. This is a dish that is an undercover agent. It doubles as both a breafast dish... and a dinner dish. It would even be suitable as a brunch dish, so technically, it's a triple agent? Anyway, we are dealing with a sausage casserole today. Let's put on our super spy glasses and our aprons and let's get cooking!


Breakfast Sausage Casserole


You will need:


  • 1 pound sage flavored breakfast sausage
  • 3 cups shredded potatoes, drained and pressed
  • 1/4 cup butter, melted
  • 12 ounces mild Cheddar cheese, shredded
  • 1/2 cup onion, shredded
  • 1 (16 ounce) container small curd cottage cheese
  • 6 jumbo eggs


Are you ready? Let's get to it!


  1. Preheat the oven to 375 degrees. 
  2. Lightly grease a 9x13 inch square baking dish. 
  3. Place the sausage in a large, deep skillet. 
  4. Cook over medium-high heat until evenly brown. 
  5. Drain, crumble, and set the sausage aside. 
  6. In the prepared baking dish, stir together the shredded potatoes and butter. Line the bottom and sides of the baking dish with the mixture. 
  7. In a bowl, mix the sausage, Cheddar cheese, onion, cottage cheese, and eggs. 
  8. Pour over the potato mixture. 
  9. Bake for 1 hour in the preheated oven, or until a toothpick inserted into center of the casserole comes out clean. 
  10. Let cool for 5 minutes before serving.
  11. Enjoy!


I hope you all have a spiffy evening and a great morning tomorrow. I leave you all with a parting gift (which by the way, I am going to start doing daily). Happy blogging and check out the video below!


Tuesday, August 16, 2011

Yeah Toast! French Toast! (Special Video Below)


Good evening bloggers! Tonight, we are diving into the wonderful world of French Toast. Everytime I hear that word, I instantly think of the youtube video about it. It's hilarious and I will share the link with you at the end of this blog. But for now, we are doing a twisted blueberry and orange version of French Toast. Let's grab those "Kiss the chef" aprons and get cooking!


Blueberry and Cream French Toast


You will need:


  • 1/4 cup red wine
  • 1/2 cup orange juice
  • 1/2 teaspoon grated orange zest
  • 1/2 cup maple syrup
  • 1 pinch crushed red pepper flakes, or to taste 
  • 8 slices whole wheat bread
  • 1/2 cup softened cream cheese
  • 1/2 cup fresh blueberries
  • 4 eggs
  • 1/3 cup milk
  • 1/4 cup butter


Ready?


  1. Bring the red wine, orange juice, and orange zest to a boil in a small saucepan, then reduce the heat to medium-low and cook for 5 minutes. 
  2. Pour in the maple syrup and crushed red pepper flakes. 
  3. Continue cooking 5 minutes more, then reduce the heat to warm and keep the syrup hot. 
  4. Meanwhile, spread one side of each slice of bread with the softened cream cheese. 
  5. Press the blueberries into the cream cheese and sandwich two pieces of bread together with the cream cheese on the inside to form the sandwiches and set aside. 
  6. Beat the eggs in a mixing bowl, then whisk in the milk until smooth. 
  7. Melt the butter in a large skillet over medium heat. 
  8. Dip the sandwiches into the egg mixture allowing the egg to soak into the bread. 
  9. Allow the excess egg to drip off. 
  10. Cook the sandwiches in the hot butter until golden brown on both sides and the bread is no longer soggy, about 5 minutes per side. 
  11. Serve with the hot orange maple syrup.
  12. Enjoy!


I hope you all have a wonderful evening and I will catch you all tomorrow for another delicious entry to Everyday Meals. I leave you all with this funny video. Happy blogging!


Monday, August 15, 2011

Sausage Gravy and Biscuits


Good evening bloggers! Are you all ready for another delicious breakfast recipe? I know I am! Tonight, we are taking our recipe restaurant-side. When you think Sausage gravy and biscuits, I'm sure the first thing you think of is "Mom's breakfast", but I stop and think of Cracker Barrel or Denny's. Well, we are taking those yummy versions and splashing them into one! Grab those aprons and let's get cooking!


Restaurant Style Sausage Gravy and Biscuits


  • 1 (16 ounce) package bulk pork breakfast sausage
  • 1 (26.5 ounce) can condensed cream of mushroom soup
  • 2 cups water
  • 1 (16.3 ounce) can refrigerated biscuit dough


Still with me? Great!


  1. Preheat the oven to 350 degrees. 
  2. Place the sausage into a deep, heavy skillet over medium heat, and cook, making sure to stir until the sausage is browned and crumbly, about 15 minutes. 
  3. Drain the excess grease, and mix the sausage with the cream of mushroom soup and water. 
  4. Bring to a boil, then reduce the heat to a simmer, and cook until the gravy has thickened, about 15 minutes. 
  5. While gravy is simmering, pop open the can of biscuit dough, and gently separate biscuits. 
  6. Place them onto a an un-greased baking sheet about 2 inches apart. 
  7. Bake the biscuits until golden brown, 13 to 17 minutes. 
  8. Split the biscuits in half, place onto serving plates, and ladle gravy over biscuits to serve.
  9. Enjoy!


I hope you all have a marvelous evening, followed by a delicious morning with a great breakfast. I will catch you all on the flip side. Happy blogging!

Sunday, August 14, 2011

Breakfast Week: Day 1


Good afternoon bloggers! This week, we are on a quest for the most delicious Breakfast recipes possible! We are going to take it to the extremes, thanks to a brilliant idea Mae gave me. She suggested a quiche. I lob\ve a warm, steamy quiche to brighten my day. With that being said, let's grab our whishs and get cooking!


Country Quiche


You will need:


  • 8 slices bacon
  • 1 small onion, chopped
  • 4 eggs
  • 2 tablespoons milk
  • 2 tablespoons all-purpose flour
  • 1 teaspoon dried parsley
  • 1/4 teaspoon dried thyme
  • salt and pepper to taste
  • 1 (9 inch) unbaked pie crust
  • 1/4 cup shredded mozzarella cheese
  • 1/2 cup shredded Cheddar cheese


Still with me?


  1. Preheat the oven to 350 degrees. 
  2. Place the bacon in a large, deep skillet. 
  3. Cook over medium high heat until evenly brown. 
  4. Drain the crumbled bacon and set aside, making sure to reserve 1 tablespoon of grease. 
  5. Heat the reserved bacon grease in the skillet and saute the onion until soft. 
  6. In a large bowl, beat together the eggs, milk, flour, parsley, thyme, salt and pepper. 
  7. Add the bacon, onion, mozzarella and cheddar cheese, then mix well. 
  8. Pour the mixture into the pie crust. 
  9. Bake in the preheated oven for 45 minutes, or until lightly brown on top and firm in the middle. 
  10. Serve warm.
  11. Enjoy!


I hope you all have a smashing day and I can't wait to bring in more breakfast recipes! Happy blogging and I'll catch you all on the flip side.

Saturday, August 13, 2011

Yellow, Square, and FULL of Sugar!


Good evening bloggers. I don't have a whole two paragraphs to write tonight, but I do have an award winning dessert for everyone to try out. I know most of you are familiar with Lemon Squares. That's exactly what is on our menu tonight. So, grab your shopping list, your apron, and your whisks and let's get baking!


Lemon Squares


You will need:


  • 1 cup unsalted butter
  • 2 cups sifted all-purpose flour
  • 1/2 cup sifted confectioners' sugar
  • 2 cups white sugar
  • 4 eggs
  • 1 lemon
  • 6 tablespoons lemon juice
  • 1/2 teaspoon baking powder
  • 1.5 cups chopped walnuts
  • 1 tablespoon all-purpose flour


  1. Preheat the oven to 325 degrees. 
  2. Grease a 9x13 inch pan. 
  3. To make the crust: In a large mixing bowl, beat together the butter, 2 cups of the flour, and confectioners' sugar until fluffy. 
  4. Scrape the mixture into the pan and smooth out. 
  5. Bake for 15 minutes. 
  6. In a medium bowl, beat the eggs and sugar. 
  7. Grate the rind of the lemon and add the rind, along with 6 tablespoons of lemon juice, to the egg mixture. 
  8. Sprinkle 1 tablespoon of flour and the baking powder over the mixture. 
  9. Fold in the nuts and mix until well blended. 
  10. Pour the lemon mixture into the crust. 
  11. Bake for another 35 minutes, until the filling is set. 
  12. Let cool before cutting.
  13. Enjoy!


I hope you all have a splendid evening. Stay tuned because we start Breakfast Week tomorrow! Happy blogging and love to all.

Friday, August 12, 2011

Cake-a-palooza!


Good afternoon bloggers! As you all noticed, I disappeared yesterday. I have no reason and I have no excuse, but I do have a big hug to all of you, seeing as I'm back now! Today, we will be dealing with two (2) types of desserts. Both are cakes but one is called a "kuchen". Kuchen is the German word for "cake". With that being said, let's go bake some cakes!


Plum Custard Kuchen


You will need:


  • 1 cup all-purpose flour
  • 1 tablespoon white sugar
  • 1 teaspoon baking powder
  • 1/2 cup butter
  • 2 tablespoons heavy cream
  • 1 egg
  • 2.5 cups pitted and sliced plums 
  • 1/2 cup heavy cream
  • 1/2 cup white sugar
  • 1 egg
  • 1 teaspoon vanilla extract


  1. Preheat the oven to 350 degrees. 
  2. In a large bowl, mix the flour, 1 tablespoon sugar and baking powder. 
  3. Cut in the butter until the mixture looks like coarse crumbs. 
  4. Stir in 2 tablespoons whipping cream and 1 egg. 
  5. Press the mixture into the bottom of an ungreased 9 inch square pan and arrange the plums over the top. 
  6. Bake in the preheated oven for 25 to 30 minutes. 
  7. While the cake is baking, in a bowl, combine 1/2 cup whipping cream, 1/2 cup sugar, 1 teaspoon vanilla and 1 egg. 
  8. Beat well, and pour the mixture over the plums and bake an additional 20 to 30 minutes or until the custard is set. 
  9. Serve warm or cool.
  10. Enjoy!


Still with me? Yay!


Black Magic Cake


You will need:


  • 1.75 cups all-purpose flour
  • 2 cups white sugar
  • 3/4 cup unsweetened cocoa powder
  • 2 teaspoons baking soda
  • 1 teaspoon baking powder
  • 1 teaspoon salt
  • 2 eggs
  • 1 cup strong brewed coffee
  • 1 cup buttermilk
  • 1/2 cup vegetable oil
  • 1 teaspoon vanilla extract


  1. Preheat the oven to 350 degrees. 
  2. Grease and flour two 9 inch round cake pans or one 9x13 inch pan. 
  3. In a large bowl combine the flour, sugar, cocoa, baking soda, baking powder and salt. 
  4. Make a well in the center. 
  5. Add the eggs, coffee, buttermilk, oil and vanilla. 
  6. Beat for 2 minutes on medium speed, if you have a mixer. If you do not, beat until the mixture is well blended; the batter will be thin. 
  7. Pour the mixture into the prepared pans. 
  8. Bake at 350 degrees for 30 to 40 minutes, or until a toothpick inserted into center of cake comes out clean. 
  9. Cool for 10 minutes, then remove from the pans and finish cooling on a wire rack. 
  10. Fill and frost as desired.
  11. Enjoy!


I hope you all get a giant kick out of these super sweet dessert cakes. We have one final day remaining in our Dessert week and then it's off to do something new. Maybe a breakfast week? Who knows? But for now, I'm saying "See ya later" and I will catch you all on the flip side. Happy blogging and love to you all!

Wednesday, August 10, 2011

Mmmm! Cobbler!


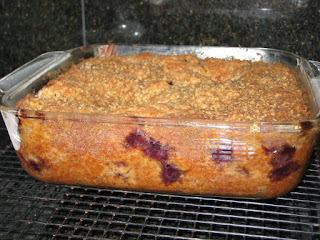
Good afternoon bloggers! I come to you early today on account of me not feeling too hot. I wanted to post this before I drifted off into a heavy sleep. Anyway, we have a wonderful cobbler recipe for you all to try. If you dislike blueberries, then this dish may not be for you, but please, I encourage you to stick through and at least see what it's all about. It may surprise you and you may end up liking this delightful little ditty of a dessert. So, with that being said, let's get baking!


Blueberry Streusel Cobbler


You will need:


  • 1 pint fresh or frozen blueberries
  • 1 (14 ounce) can Sweetened Condensed Milk
  • 2 teaspoons grated lemon peel
  • 3/4 cup cold butter or margarine
  • 2 cups biscuit baking mix, divided
  • 1/2 cup firmly packed brown sugar
  • 2 tablespoons cold butter or margarine
  • 1/2 cup chopped nuts  


  1. Preheat oven to 325 degrees. 
  2. In a bowl, combine the blueberries, sweetened condensed milk and lemon peel. 
  3. In another large bowl, cut 3/4 cup butter into 1.5 cups biscuit mix until crumbly, then stir in the blueberry mixture. 
  4. Spread the mixture into a greased 9 inch square baking pan. 
  5. In a small bowl, combine the remaining 1/2 cup biscuit mix and brown sugar. Cut in the remaining 2 tablespoons butter until crumbly, then add the nuts. Sprinkle the nutty mixture over the cobbler. 
  6. Bake for 65 to 70 minutes. 
  7. Serve and enjoy!


I hope you all have enjoyed this delightful sweet treat. I will catch you all very soon. Have a great day and happy blogging to all! <3

Tuesday, August 9, 2011

Peach Coffee Cake


Good evening bloggers! We have a special dessert for all of you tonight. I love coffee, but many of you may not. This cake is the perfect company to those delightful times when you do want coffee. If you don't drink coffee, this cake still pairs well with tea if you like that too. Well, enough chatter. Let's get baking!


Peach Coffee Cake


You will need:


  • 1/2 cup brown sugar
  • 1/4 cup maple syrup
  • 3/4 cup peach yogurt
  • 1 very ripe banana, mashed
  • 1/4 cup butter, melted
  • 1 egg, beaten
  • 1/2 cup steel cut oats
  • 1 cup all-purpose flour
  • 3/4 cup whole wheat flour
  • 2 teaspoons baking powder
  • 1/2 teaspoon baking soda
  • 2 teaspoons ground cinnamon
  • 1/4 teaspoon salt
  • 1 cup chopped ripe peach 
  • 1/2 cup chopped pecans
  • 1/2 cup whole wheat flour
  • 1/4 cup brown sugar
  • 1/4 cup butter, melted
  • 1 pinch ground cinnamon


  1. Preheat an oven to 375 degrees. 
  2. Grease a 9x9 inch baking pan. 
  3. Mix together 1/2 cup brown sugar, maple syrup, peach yogurt, banana, 1/4 cup melted butter, egg, and oats in a large bowl until well blended. 
  4. Allow the mixture to rest until the oats have softened, about 10 to 20 minutes. 
  5. Combine all-purpose flour, 3/4 cup whole wheat flour, baking powder, baking soda, 2 teaspoons cinnamon, and salt in a bowl. 
  6. Stir the flour mixture and peaches into the banana mixture until just combined. 
  7. Pour the mixture into the prepared baking pan. 
  8. Mix the pecans, 1/2 cup whole wheat flour, 1/4 cup brown sugar, 1/4 cup melted butter, and a pinch of cinnamon in a bowl. 
  9. Spread the pecan mixture over the cake batter. 
  10. Bake in the preheated oven until a toothpick inserted into the center comes out clean, 40 to 50 minutes. 
  11. Cool in the pan for 10 minutes before removing to cool completely on a wire rack.
  12. Enjoy!


I hope you have a very sweet and tasty evening. I will catch you all on the flip side with more dessert recipes. Happy blogging and I'll see you later!

Monday, August 8, 2011

Oooh! Pie!


Good evening bloggers. This is a slightly delayed post. I have been a bit tied up today. I am a "designer" so to speak and I get pretty busy during the day. Well, anyway... I promised you all a tasty and sweet pie today and I have come through! Grab your aprons and those handy, dandy whisks and spoons and let's get baking!


Raspberry-Lemon Pie with a Coconut Crust


You will need:


  • 2 cups shredded coconut
  • 1/2 cup unsalted butter, melted
  • 1.5 cups white sugar
  • 1/2 cup unsalted butter
  • 1/4 cup fresh lemon juice
  • 3 eggs at room temperature
  • 2 egg yolks at room temperature
  • 1 tablespoon grated lemon zest
  • 1.5 pints fresh raspberries


  1. Preheat the oven to 350 degrees. 
  2. Spread the coconut onto a baking sheet, and bake in the preheated oven until lightly toasted and golden, about 10 minutes. 
  3. Watch carefully to prevent burning. 
  4. Mix the coconut and 1/2 cup melted butter in a bowl, and chill until it begins to firm, about 15 minutes. 
  5. Pat the coconut mixture into the bottom and up the sides of a 9 inch pie dish. Chill the crust until set, at least 30 minutes. 
  6. Place the sugar, 1/2 cup of butter, lemon juice, eggs, and egg yolks in a saucepan. 
  7. Place over low heat, and whisk constantly until thickened for 15 to 20 minutes, but do not boil. 
  8. Strain the custard through a fine-mesh strainer into a bowl, and stir in the lemon zest. 
  9. Place a sheet of plastic wrap directly onto the surface of the custard, and chill thoroughly. 
  10. Spoon the lemon custard into the coconut crust, and top with fresh raspberries.
  11. Enjoy!


I hope you all have a spiffy rest of the evening and I will catch you on the flip side, hopefully earlier tomorrow. Happy blogging and love to you all!

Sunday, August 7, 2011

Cheesecake Mania!

Good afternoon bloggers! We are here for another very sweet and very rich entry to Everyday Meals. Today, we are dabbling in the fine art of cheesecake! This is an area where I am the champion. Every Christmas, my sister and I bake our Peppermint cheesecake with candycane bits in it. It is a bit hit and also, an original. Unfortunately, we will not be making that today. That is a family secret. Instead, we will be making... drum roll please?


Caramel Apple Cheesecake


You will need:


  • 1 (21 ounce) can apple fruit filling, divided
  • 1 (9 inch) graham cracker crust
  • 16 ounces cream cheese, softened
  • 1/2 cup granulated sugar
  • 1/2 teaspoon vanilla extract
  • 2 eggs
  • 1/2 cup caramel topping
  • 12 pecan halves plus 2 tablespoons chopped pecans


Still with me?


  1. Heat the oven to 350 degrees.
  2. Reserve 1/2 cup apple filling and spoon the remaining filling into the crust.
  3. Beat together the cream cheese, sugar and vanilla extract until smooth.
  4. Add the eggs, one at a time, mixing well after each addition.
  5. Pour the eggs over the apple filling. 
  6. Bake for 35 minutes or until center is set, then leave to cool.
  7. Mix the reserved apple filling and caramel topping in a small saucepan, and heat for about 1 minute.
  8. Arrange the apple slices around the outside edge of the cheesecake. 
  9. Spoon the caramel sauce onto the cheesecake and spread evenly.
  10. Place the pecan halves around the cheesecake edge, then sprinkle the top with chopped pecans. 
  11. Refrigerate at least 6 hours until firm.
  12. Enjoy!


I hope you have a delightfully sweet afternoon and rest of the night. I will catch you all tomorrow for a scrumptious pie recipe! Happy blogging and I'll catch you on the flip side.

Saturday, August 6, 2011

Who Loves Sweet Treats? I Do!

Good evening bloggers. I want to welcome you all to our first day (or night depending on where you are) of Dessert Week! We will be taking a tasty Asian dessert straight out of Mae's Kitchen and into our own. When you think dessert, you don't typically go straight for Asian dessert, do you? I know I was blind to it until Mae showed me this recipe. Well, I'm glad she did. So, let's grab our aprons and get in that kitchen!


Ichigo Daikufu


You will need:


  • 1 cup shiratama-ko (glutinous rice flour)
  • 1/4 cup sugar
  • 2/3 cup water
  • For The Filling
  • 1/3 cup water  
  • 1/2 cup sugar, 1/4 cup dried anko powder, or 1/2 cup premade anko (sweet red bean paste)
  • 6 strawberries
  • katakuriko potato starch or corn starch for dusting


  1. Heat 1/3 cup of water and 1/2 cup of sugar in a pan. 
  2. Add 1/4 cup of anko powder in the pan and stir well, then set aside. 
  3. Wash the strawberries and remove the calyxes. 
  4. Wrap a strawberry with about a spoonful of anko and round it to make a ball. 
  5. Make 6 balls. 
  6. Put the shiratama-ko in a heat-resistant bowl. 
  7. Mix 2/3 cup of water and 1/4 cup of sugar in a small bowl. 
  8. Pour in the shiratamako, making sure to stir well. 
  9. Put the bowl in the microwave and heat the dough for about two minutes. Stir the dough, then continue to heat the dough in microwave until the dough inflates. 
  10. Stir the mochi quickly. 
  11. Dust a flat pan with some katakuri-ko starch. 
  12. Also, dust your hands with some katakuri-ko. 
  13. Remove the hot mochi from the bowl to the pan by hands. 
  14. Dust your hands with more katakuri-ko starch and divide the mochi into 6 pieces by hands. 
  15. Make 6 flat and round the mochi. 
  16. Put a piece of strawberry and anko filling on a mochi piece and wrap it by stretching mochi, then round the daifuku. 
  17. Repeat the process to make more pieces.
  18. Enjoy!


I hope you all enjoyed this sweat treat from our friend, Mae. Have a sweet and savoury evening and I will see you all tomorrow for possibly the *best* cheesecake recipe ever! Happy blogging and I'll catch you on the flip side!

Thursday, August 4, 2011

Soup, Soup, Soup!

Good afternoon bloggers! I've got another recipe from Mae's kitchen to bring to our own. We've done many Asian recipes, but one recipe we have yet to make is soup. That is what we are going to do today. This is a fairly easy recipe and I'm sure it will leave you salivating from the smell as it cooks. Let's grab our whisks, our woks, and our aprons and let's get cooking!


Wasabi Snap Peas, Daikon, and Egg Soup


You will need:


  • 4 large eggs
  • 2 scallions, roots and tops cut off
  • 3 tablespoons rice bran oil
  • 1/3 cup finely diced yellow onions
  • 1/3 cup finely diced and peeled daikon
  • 1 shitake mushroom, stem cut off and cap finely sliced
  • 5 cups dashi
  • 1 teaspoon sake
  • 1 teaspoon ground sea salt
  • freshly ground black pepper
  • 20 snap peas, springs removed, cut into thirds
  • 1 teaspoon soy sauce


  1. Break th eggs into a medium sized bowl and whisk until thoroughly mixed.
  2. Cut one of the scallions into half inch long batons for soup. 
  3. Thinly slice the other scallion to use as garnish.
  4. Place a wok over high heat. 
  5. Add 2 tablespoons of the oil and swirl it around to coat the interior of the wok. 
  6. When the oil begins to simmer, add the beaten eggs; they will form a disc and immediately begin to puff and bubble around the edges. 
  7. Fry the egg for 2 minutes or until the center portion is no longer runny. 
  8. Turn the egg and fry for one more minute, then transfer to a plate. 
  9. When the egg is cool enough to handle, tear it into bite-size pieces.
  10. Add the remaining 1 tablespoon of oil to the wok. 
  11. When hot, add the onion, daikon and mushroom. 
  12. Stir fry for 3 minutes, then add the dashi, sake, salt and several grinds of pepper and bring to a boil. 
  13. Skim off the foam from the surface with a ladle. 
  14. Reduce the heat to medium and simmer the soup for about 3 minutes or until the daikon has turned translucent.
  15. Add the bits of torn omlette to the soup, along with the snap peas, scallion batons and soy. 
  16. Cook over high heat for 1 to 2 minutes or until the snap peas are crisp, but slightly tender
  17. Lay out 4 large soup bowls and ladle equal portions of the soup into them. Garnish with scallion.
  18. Enjoy!


I hope you all have a great rest of the day. Don't work too hard, or play too hard for that matter. Stay cool and come back tomorrow for another delicious recipe from our friend Mae! Happy blogging and I'll catch you all on the flip side! <3

Wednesday, August 3, 2011

Teriyaki Fish

Good evening bloggers! I was going through my email today and this dish from Mae popped right out to me. I am a sucker for fish and a sucker for teriyaki! I could put teriyaki and soy sauce on everything, but I don't. Anyway, we are going to be handling some fish tonight. So, let's grab our aprons, knives, and pans and get down to business!


Teriyaki Fish


You will need:


  • 4 fish fillets (Wild Alaskan Salmon, Farmed Striped Bass OR Pacific Halibut work wonderfully)
  • 1 tablespoon rice bran oil

FOR THE MARINADE

  • 2 tablespoons sake
  • 4 teaspoons soy sauce

FOR THE TERIYAKI SAUCE

  • 1/4 cup mirin
  • 2 tablespoons soy
  • 1 teaspoon sugar


  1. Make the marinade by blending the sake and soy in a dish. 
  2. Place the fish fillets flesh side down in the dish and marinate for 10 minutes.
  3. Make the teriyaki sauce by blending together the mirin, soy and sugar, then whisk until the sugar has dissolved.
  4. Heat oil in a large skillet over medium high heat. 
  5. Using a paper towel, gently blot each fish fillet on both sides to absorb any excess marinade. 
  6. Place the fillets in the skillet (skin side down) and cook for 5 minutes. 
  7. Turn the fillets an cook for 1 minute.
  8. Transfer the fish to a large plate and peel off the skin.
  9. With a paper towel, wipe out any excess grease from the skillet. 
  10. Place it back over medium high heat and add the teriyaki. 
  11. Bring it to a boil, reduce the heat to medium and simmer the sauce for 1 minute. 
  12. Add the fish into the pan. 
  13. Tip the pan slightly and spoon some of the teriyaki over the fillets. 
  14. Cook them for 1 minute or until the center portion is just cooked through.
  15. Arrange on plates and top with teriyaki.
  16. Enjoy!


I hope you all have had a wonderful day. I will be back tomorrow with more Asian themed dinners for you to enjoy. Oh, just a little sneak peek of what next week brings... Who loves sweets? I do! Have a great evening and happy blogging!

Tuesday, August 2, 2011

A Delicious Version of Burgers

Good afternoon bloggers! We are keeping with the trend of Asian delights this week. Today we have another excellent dish from our resident guest blogger, Mae. This was a dish someone special to her used to make and now we are going to try our hands at it. It's a twist on burgers that I'm sure all of us will enjoy. Let's grab our aprons and get cooking!


Salmon Edamame Burgers


You will need:


  • 1 one inch chunk of fresh, peeled ginger root
  • 1 cup blanched, shelled Edamame
  • 1/2 cup finely chopped onion
  • 1/2 cup finely chopped green capsicum
  • 1 tablespoon sake
  • 1.5 teaspoon soy sauce
  • 1/4 teaspoon salt
  • ground black pepper
  • 1/2 cup all purpose flour
  • 1 cup panko
  • 1 egg
  • 4 cups oil
  • 4 cup small sprig mitsuba OR Italian parsley


  1. Place the chunk of ginger root in a food processor fitted with a metal blade and prrocess until minced, scraping down the sides of the work bowl one or two times. 
  2. Add the shelled edamame and pulse until minced as well. 
  3. Transfer the contents of the processor to a large bowl.
  4. Place the raw salmon chunks in the food processor and process until ground. Transfer the salmon to the bowl with the edamame and add onion, green pepper, sake, soy, salt and several grinds of pepper. 
  5. Stir the mixture until well blended.
  6. Lightly wet your hands and form the salmon into patties, then set aside.
  7. Put flour on a large plate and panko on another. 
  8. Beat the egg, then one by one coat each salmon patty in the flour, then the egg, followed by the panko. 
  9. Remove the patty from the panko and press it between your hands.
  10. Heat the oil in a deep skillet and bring the heat to 340 degrees. 
  11. Lower the salmon patties into the oil and fry them for 2 minutes on each side or until golden brown. 
  12. Lay out 4 plates and arrange 2 patties on each plate.
  13. Garnish with mitsuba or parsley.
  14. Enjoy!


I hope you all have a wonderful afternoon. Enjoy your culture and remember, we are always up for new cultural ideas. Happy blogging and I'll catch you on the flip side!

Monday, August 1, 2011

Asian Authenticity!

Good evening bloggers! If you were around last night, we had a mash up of tons of different recipes. Tonight, I paired up with my lovely guest, Mae M. again and she shared these lovely authentic recipes with me. We are taking a bit of Asian culture and making it our own. Let's put our hands together for Mae and her recipes and let's get started!


Tokyo Fried Chicken


You will need:


  • 4 boneless, skinless chicken breasts cut into bite sized pieces
  • 2 inch long chunk of FRESH ginger
  • 1 tablespoon soy sauce
  • 2 teaspoon sake
  • 1 teaspoon Mirin
  • 1/2 cup cornstarch
  • 2 cups rice bran oil
  • 4 shisho leaves for garnish, cut into thin ribbons
  • soy sauce for serving


  1. Put the chicken into a bowl. 
  2. Line a small bowl with cheesecloth. 
  3. Grate the ginger over the bowl, gather the cheesecloth around the ginger and squeeze the cheesecloth to release the ginger juice. 
  4. You should have 1.5 teaspoons of ginger juice. 
  5. Pour the ginger juice over the chicken, along with the soy, sake and mirin. Toss the chicken to coat and let marinate for 10 minutes.
  6. Place the cornstarch in small bowl. 
  7. Remove the chicken and blot any excess marinade from the chicken with paper towels. 
  8. Working with a few pieces of chicken at a time, drop them into the starch and push them around until coated, then put on a platter.
  9. Heat the oil in a wok until it's 350 degrees. 
  10. Working in batches, add 1/3 of the chicken to the oil. 
  11. Fry for 1 minute on each side or until the chicken is golden and just cooked through. 
  12. Transfer the fried chicken to a platter lined with paper towels. 
  13. Cook the remaining chicken in the same fashion.
  14. Transfer the chicken to a large serving dish. 
  15. Sprinkle it with the shiso ribbons and bring to the table, along with a bottle of soy.
  16. Enjoy!


Simmered Succulent Tofu


You will need:


  • 1 cup fresh squeezed lemon juice
  • 1 cup soy sauce
  • 3 tablespoons Mirin
  • 1/2 cup Bonito Flakes
  • 4 shisho leaves, sliced thin
  • 2 scallions, roots and tops cut off and thickly sliced
  • 5 cups Dashi
  • 2 one pound blocks Silken OR Cotton Tofu


  1. Blend the lemon juice, soy, and mirin in a small bowl to create a dipping sauce.
  2. Place the bonito flakes in a small dish and the slivered shiso leaves and scallions on a small plate. 
  3. Bring these garnishes to the table along with 4 small bowls for the dipping sauce.
  4. Place the dashi in a deep, 3 quart oven to table casserole dish with a lid.
  5. Gently rinse the tofu under cold water. 
  6. Cut each block into large bite size squares and add them to the dashi. 
  7. Turn the heat to medium. 
  8. The tofu cubes will swell and puff as the dashi heats. 
  9. When the dashi is almost boiling, reduce the heat to low and gently simmer the tofu cubes for 4 minutes. 
  10. When you remove the casserole from the flames, cover it and set it on a trivet in the center of the table.
  11. To serve, let each diner pour approximately 2 tablespoons of dipping sauce into a small bowl. 
  12. Using a small ladle, retrieve a few tofu cubes from the hot dashi, along with a little extra dashi and add to the small bowl. 
  13. Season with the garnishes if desired.
  14. Enjoy!


Well, until tomorrow, I bid you a good night. Stay tuned for more amazing recipes from more friends like Mae! I'll catch you on the flip side. Happy blogging!