Monday, March 2, 2015

Nutella Stuffed Blondies

Good afternoon foodies and friends! I know I disappeared on you all for a while, and for that, I'm sorry. Life has been unexpectedly busy. I've been busy with schooling, my son, and pretty much everything in between. I've also got an aunt coming down from Anchorage, Alaska today so we've been prepping for her arrival. In celebration, I wanted to post a scrumptiously sweet blog entry. Today, we will be making blondies.

Blondies are just like brownies, but the difference is the use of vanilla instead of cocoa, and brown sugar instead of regular white sugar. These blondies are extra special though! They will house a delightful dollop of Nutella® (pronounced Noo-tella)! Before we begin though, I ask that we all give a moment of silence for Michele Ferrero, son of Pietro Ferrero, the original creator of Nutella® . Michele recently passed away in February on Valentine's Day. Michele reinvented Nutella®, making it into the yummy spread we enjoy today. May he rest in peace.

Now, please grab your baking buddies, and I'll meet you in the kitchen!


Nutella® Stuffed Blondies
Yields 12 Servings


You will need:


  • 1 cup + 1/4 cup Nutella®
  • 10 tablespoons butter (1 stick + 2 tablespoons)
  • 2 cups dark brown sugar, packed
  • 4 ounces cream cheese, softened
  • 2 teaspoons vanilla
  • 2 large eggs
  • 2 cups all-purpose flour, spooned and leveled
  • 1 teaspoon baking soda
  • 1/2 teaspoon salt


Ready?


  1. Line a small baking sheet with wax paper and clear out some space in your freezer. 
  2. Measure 1 cup of Nutella®
  3. Use 2 spoons to divide the Nutella® into about 12 dollops on the wax paper, each one about 2 or 3 teaspoons. 
  4. Place the sheet in the freezer while you make the blondies.
  5. Preheat the oven to 350 degrees. 
  6. Line an 8x11x2 inch baking dish (2 quart) with parchment paper, or grease well.
  7. In a small saucepan, melt the butter over medium heat. 
  8. Stir occasionally until the foam starts turning golden and the mixture smells nutty. 
  9. Remove from heat and pour immediately into a mixing bowl.
  10. Stir in the brown sugar and cream cheese. 
  11. Beat for about 2 minutes, until slightly fluffy.
  12. Add the vanilla, then the eggs. 
  13. Beat well, scraping the sides.
  14. Add the 2 cups of flour but don't mix it in. 
  15. Use a small spoon to stir the baking soda and salt into the flour, then mix the flour into the batter. 
  16. Stir until just combined.
  17. Add the 1/4 cup Nutella® and swirl it with a rubber spatula. 
  18. Don't stir it in all the way, leave some streaks. 
  19. Pour into the prepared 2-quart pan, spreading to the edges.
  20. Remove the Nutella® from the freezer. 
  21. Use your fingers to push each dollop of Nutella® into the dough. 
  22. Distribute them evenly. 
  23. Smooth the dough over the Nutella® with a spatula.
  24. Bake for 27 to 30 minutes, until golden brown on top. 
  25. Cool completely. 
  26. Lift the parchment paper out of the pan and cut into bars.
  27. Enjoy!


Thank you for joining me tonight! I'll be back as soon as possible, or once I get some down time. Have a great night, and happy blogging to you all!


~Mandie

Monday, February 16, 2015

Salmon, Bacon, and Guacamole Wraps

Good morning foodies and friends! Today is a pretty busy day for me. It's my Mother's birthday, so time is slim. I've got two cakes to make, errands to run, and a baby to take care of. Today's entry is a simple recipe that you can take on the run if prepared ahead. We will be making wraps! I love the simplicity of wraps. You throw things inside, wrap, and go. This recipe will take you about 30 minutes total, but as I stated before, you can make this ahead if you are crunched on time.

The salmon can be kept separately from other ingredients in the fridge for approximately 5 to 6 days after cooking in a tightly sealed container. If you would prefer to freeze it after cooking (for whatever reason), it will last for 6 to 9 months, also in an appropriately sealed, freezer-safe container. Any how, I'm ready to share this delicious recipe. I'll meet you in the kitchen! Let's go!


Salmon, Bacon, and Guacamole Wraps
Yields 4 Servings


You will need:


  • 1 pound salmon fillet
  • 2 tablespoons white or red onion, minced
  • 1 tablespoon jalapeño pepper, seeded and minced
  • 1 small clove garlic, minced
  • 1 tablespoon fresh cilantro leaves, chopped
  • 1 large ripe avocado
  • 1.5 tablespoons freshly squeezed lime juice
  • 1/2 teaspoon kosher salt or more to taste
  • 4 slices thick cut bacon, cooked and drained
  • Baby spinach leaves
  • 4 fajita-size flour tortillas


Ready?


  1. Preheat oven to 350 degrees. 
  2. Season salmon fillet with salt and pepper and place on a foil lined baking sheet. 
  3. Roast salmon in oven for 15 to 20 minutes or until salmon is cooked through. 
  4. Let cool slightly.
  5. Meanwhile, prepare the guacamole. 
  6. In a medium bowl, stir together onion, jalapeño, garlic, and cilantro. 
  7. Cut the avocado in half lengthwise around the pit. 
  8. Twist the avocado halves in opposite directions and pull the halves apart. 
  9. Scoop out the avocado pulp with a spoon and add to the onion mixture. 
  10. Add lime juice and salt. 
  11. With a spoon or fork, roughly mash the avocado while mixing in the onion mixture until evenly combined. 
  12. Taste and season with additional lime juice or salt as needed. 
  13. Set aside.
  14. To assemble the wraps, warm tortillas in microwave for 60 to 90 seconds so they are soft enough to roll. 
  15. Spread guacamole down the center of each tortilla. 
  16. Top with large chunks of the cooked salmon, one slice of bacon, and some spinach leaves. 
  17. Roll up each tortilla and serve.
  18. Enjoy!


Thank you for joining me today. If you have any questions or concerns about food handling, storage, or general questions about this recipe, please feel free to comment below and I will do my best to answer in a timely manner. Have a great day and I'll see y'all soon with another recipe! Happy blogging!


~Mandie

Tuesday, February 10, 2015

A Day of Romance - Valentine's Day Special

Good evening bloggers and friends. For those of you who know me closely should know by now that I am the female version of Scrooge on Valentine's Day. It's not because I'm alone, or because I am cheap and don't want to celebrate. I'm just one of those people who disagrees with what Valentine's Day is all about. As much as I abhor this holiday, I refuse to let my feelings get in the way of sharing delicious recipes.

Today's post is specifically for those lovers out there who are celebrating this year. We will have 2 recipes to make, one for breakfast and one for dinner. Please go out and share the love, these recipes, and the holiday with those near and dear to you! Enjoy!


Lazy Strawberry Cinnamon Rolls
Yields 12 Rolls


You will need:


  • 1 pack frozen puff pastry, thawed
  • 2 tablespoons melted butter
  • 1 cup strawberry jam
  • 2 to 3 cups strawberries, sliced thinly
  • 1 teaspoon ground cinnamon
  • 3/4 cup confectioner's sugar
  • 3 tablespoons butter, melted
  • 1.5 tablespoons milk
  • 1 teaspoon strawberry jam


Ready?


  1. Preheat oven to 400 degrees.
  2. Lightly flour your surface and roll out 1 sheet of thawed puff pastry until about 1/4 inch thick.
  3. Brush puff pastry with melted butter, leaving 1-inch of space around the edges.
  4. Evenly add strawberry jam then layer with strawberry slices and sprinkle on ground cinnamon over buttered area.
  5. Tightly but gently roll the dough up. 
  6. Use a little melted butter on the open edge of the roll to seal the seam.
  7. Using a sharp knife, slice the roll into six pieces.
  8. Place each roll inside a parchment paper lined baking dish. 
  9. Place the dish in the refrigerator as you repeat the above steps with the last sheet of puff pastry if using.
  10. Bake the cinnamon rolls in preheated oven for 25 to 30 minutes or until golden.
  11. While rolls are baking, make the icing by mixing all remaining ingredients together (confectioner's sugar, butter, milk and jam) until nice, smooth, and pourable. If needed, add a teaspoon more of milk until it is pourable.
  12. Drizzle over cinnamon rolls when they are fresh out of the oven and enjoy!


~~~~~~~~~~~~~~~~~~~~~~~~~~~~~~~~~~~~~~~~~~~~~~~~~~~~~~~~~~~~~


Seared Scallops with Bacon Fennel Cream Sauce
Yields 4 Servings


You will need:


  • 2 dozen large scallops
  • 2 cloves garlic, finely chopped
  • 4 tablespoons extra virgin olive oil
  • 1 cup whipping cream
  • 1/2 cup seafood or chicken stock
  • 1/4 cup white wine
  • 6 slices crisp, cooked bacon
  • 2/3 cup finely chopped fennel
  • Salt and pepper to taste
  • 12 ounces freshly cooked fettuccine pasta


Ready?


  1. Chop bacon into small pieces and cook until crisp in a large non stick sauté pan.
  2. Drain fat and discard.
  3. Set the bacon aside.
  4. Add the garlic and fennel to the pan. 
  5. Sauté until the fennel begins to soften, about 2 minutes or so.
  6. Add the stock and wine, then reduce the volume of the liquid to about half before adding the whipping cream.
  7. Simmer slowly for a couple of minutes, then add the bacon and season with salt and pepper.
  8. Toss the cooked pasta in the prepared sauce.
  9. In a separate heavy bottomed sauté pan, heat olive oil until very hot on medium high heat. 
  10. Lightly salt and pepper the scallops and sear them in the hot pan for only about 2 minutes per side. 
  11. Sear the scallops a few at a time and don’t crowd the pan.
  12. Serve the scallops over the fettuccine and sauce. 
  13. Garnish with chopped fennel fronds and bacon.
  14. Enjoy!


Thank you for joining me tonight! I'll see y'all again at some point this week!


~Mandie


Tuesday, February 3, 2015

Zeppole

Good evening foodies and friends! It's been a wild week. Work, school, and a teething infant have me pretty preoccupied. I honestly needed a short break, but I'm ready to return to my weekly blog entries. Tonight, we will be making a special treat that is very dear to me. It's a dessert that my big sister, Jessica, and I made quite a few times in the past.

We used to really enjoy cramming into our tiny kitchen together, sweating because of the stove being on (and our air conditioner being out), and singing as we made these deliciously wonderful treats. Yes my dears, we are making zeppole. Zeppole are deep-fried dough balls that are dusted in powdered sugar. They may be filled with custard, jelly, cannoli cream, or a butter and honey mixture. Zeppole can also be served as a savory treat, being filled with anchovies and fried in bread dough. Tonight, we will be making the sweet version, so grab those aprons and I'll meet you in the kitchen!


Zeppole
Yields 4 to 6 Servings


You will need:


  • 1 vanilla bean
  • 1/2 cup sugar, plus 3 tablespoons
  • 2 tablespoons ground cinnamon
  • 1 stick butter
  • 1/4 teaspoon salt
  • 1 cup water
  • 1 cup all-purpose flour
  • 4 eggs
  • Olive oil, for frying


Ready?


  1. Cut open the vanilla bean lengthwise. 
  2. Using the back of a knife, scrape along the inside of the vanilla bean to collect the seeds. 
  3. Scrape vanilla bean seeds into a small bowl. 
  4. Add the 1/2 cup sugar and cinnamon and stir to combine; set aside.
  5. In a medium saucepan combine the butter, salt, 3 tablespoons of sugar, and water over medium heat. 
  6. Bring to a boil. 
  7. Take pan off the heat and stir in the flour. 
  8. Return pan to the heat and stir continuously until mixture forms a ball, about 3 to 5 minutes. 
  9. Transfer the flour mixture to a medium bowl. 
  10. Using an electric hand mixer on low speed, add eggs, 1 at a time, incorporating each egg completely before adding the next. 
  11. Beat until smooth. 
  12. Meanwhile, pour enough oil into a large frying pan to reach a depth of 2 inches. 
  13. Heat the oil over medium heat until a deep-fry thermometer registers 375 degrees.
  14. Using a small ice-cream scooper or 2 small spoons, carefully drop about a tablespoon of the dough into the hot olive oil, frying in batches. 
  15. Turn the zeppole once or twice, cooking until golden and puffed up, about 5 minutes. 
  16. Drain on paper towels. 
  17. Toss with cinnamon-sugar. 
  18. Serve immediately.


I hope you all have a great evening, and I'll be back this weekend with another recipe or two. Stay tuned, and I hope to see all of you again! Good night!


~Mandie

Sunday, January 25, 2015

Liebster Award Nomination

Foodies and Friends,

I've been humbly nominated for a Liebster Award. This would be the second time I've been nominated, the first being back in 2012. I want to extend a very special THANK YOU to  Elle from Elle oh Elle for the nomination.

This award goes to bloggers with less than 200 followers, and the nominations come from bloggers just like you! In order to accept the award, you must answer 11 questions and then nominate 10 more blogs. Share the love, and again, I thank you for this nomination!


  • How long have you been blogging? 
I have been blogging since 2011. It's my passion, and I hope to continue on for many years to come!

  • What is your favorite topic to blog about?

Well, considering that my blog is all about recipe, I would have to say food!

  • What is your favorite thing to do?

I love reading, writing fiction stories, playing with my 7 month old son, and working. 

  • One article of clothing you couldn't live without?

I could not live without my scarves. Most are handmade from my darling older sister, while others were gifted to me from dear friends for the holidays.

  • If you had one call in jail who would it be to?

Well, I'd hope that I wouldn't spend any time in jail, but if I was and had to make one call, it would be to my husband.

  • Least favorite food?

Lima beans... Or maybe mushrooms. I'm sure they're tied in my book.

  • Favorite season?

Winter! I love bundling up and wearing lots of layers and the scarves I listed above.

  • Cats or Dogs?

Both. I don't discriminate against animals.

  • Where do you hope your blog will be in a year?

Honestly, I hope my blog will have more followers, as well as some form of recognition out there in the universe! 

  • Where is your favorite place to write?

I love writing at the dining room table. It's the perfect height for my short stature so I'm not hunched over like Quasimodo.

  • If you could travel anywhere where would you go?

I would go all over. I have wanderlust. I love traveling, but if I had to choose, I would choose Italy!


~~~~~~~~~~~~~~~~~~~~~~~~~~~~~~~~~~~~~~~~~~~~~~~~~~~~~~~

Nominations:


The Abbotts - The Abbott Adventures

The Hugies - The Hugie Happenings

~~~~~~~~~~~~~~~~~~~~~~~~~~~~~~~~~~~~~~~~~~~~~~~~~~~~~~~

11 Questions:


  • How long have you been a blogger?
  • If you could choose 1 post from your blog to brag about, which would it be? (Feel free to link it)
  • What is your favorite season, and why?
  • What influenced your decision to start blogging?
  • What is the first thing you think of when you wake up in the morning?
  • Is the glass half-empty or half-full?
  • Have you ever won a trophy?
  • Do you have a favorite food?
  • If you could have any job/career, what would you choose?
  • Name something you're proud of. Why?
  • What is your favorite thing about your blog?


Now go nominate some other wonderful blogs! Love to you all, and happy blogging!


~Mandie


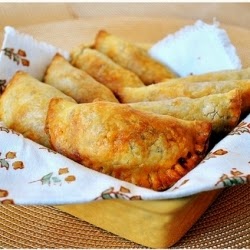
Spicy Chicken Empanadas

Good evening foodies! It's been a very long week chock full of homework, errands, and anxiety. Nothing calms my anxiety more than comfort food, and honestly, there's nothing more comforting than Mexican food. I personally feel that empanadas are a perfect comfort food. They are little folded and stuffed pastries. They are usually fried, but they could also be baked. There are far too many variations to list (almost every country has their own variation), but today we will be sticking with a traditional Mexican variation. I'm eager to share this recipe with y'all, so grab your aprons and vamonos a la cocina!


Empanada Dough


You will need:


  • 2 cups all purpose flour
  • 1 stick of unsalted butter, frozen, cubed
  • 1 teaspoon salt
  • 1/4 teaspoon baking powder
  • 4 to 5 tablespoons milk
  • 1 egg, lightly whisked


  1. Combine the flour, baking powder and salt. 
  2. In a food processor pulse the flour with the cold butter until you get a crumbly mixture. 
  3. Transfer to a bowl. 
  4. Add the egg and milk and knead in to form a sort of dough. 
  5. Dump the dough onto a lightly floured surface and bring together into a ball. 
  6. Pat into a circle of 1-inch thickness, wrap and refrigerate for at least 30 minutes.


~~~~~~~~~~~~~~~~~~~~~~~~~~~~~~~~~~~~~~~~~~~~~~~~~


Spicy Chicken Empanadas
Yields 15


You will need:


  • 1 onion, diced fine
  • 2 cloves of garlic, minced
  • 2 cups cooked chicken, shredded
  • 2 chipotle peppers in adobo sauce, minced + 1 tablespoon adobo sauce
  • 1 teaspoon cumin powder
  • 1 egg separated
  • 1/4 cup grated cheese
  • 2 to 3 tablespoons chopped coriander
  • 2 tablespoons oil
  • salt and pepper to taste
  • Empanada Dough


  1. Heat the oil in a heavy bottomed pan. 
  2. Saute the onions and garlic until translucent. 
  3. Add the chicken, chopped peppers, adobo sauce and cumin and toss to coat. 
  4. Cook for a few minutes. If it gets too dry, add water to get the right consistency. 
  5. Remove from heat and cool to room temperature. 
  6. Mix the cheese and coriander into the chicken mixture.
  7. Remove the dough from the fridge and roll out to 1/8 inch thickness. 
  8. Cut out 4-inch rounds. 
  9. Place about a tablespoon of the filling a bit off center and spread to the edges leaving a 1/4-inch border. 
  10. Brush the border with egg whites. 
  11. Fold the dough over the filling and press the edges to seal. 
  12. You can use a fork to make groove marks on the edges.
  13. Freeze the filled empanadas for 10 to 15 minutes. 
  14. Preheat oven to 400 degrees and baked the empanadas for 20 to 25 minutes until golden brown and flaky. 
  15. Cool for just a few minutes and serve immediately.


Thank you  for joining me this week! I'll be back as soon as I can with another delicious recipe. Have a great week, and happy blogging to you all!


~Mandie


Saturday, January 17, 2015

Coconut Chicken Tenders and Lemon Herb Roasted Potatoes

Good evening foodies and friends! Tonight, we will be making a complete dinner -- Yes, a complete dinner, sides and all. When I saw these recipes, I instantly thought of my baby sister, and the young woman I work for. Both of these lovely ladies enjoy coconut, probably more than I even know about. I really love coconut as well, so this dinner just kind of fell together. Now if you were to go ask anyone who knows me, I'm a meat and potatoes kinda gal. I'm of Irish descent, so it's second nature to me to have these things in my life. Before we begin, I must preface by stating that you should probably start with the potatoes before the chicken. They take a bit longer to cook than the chicken, but to each their own. I hope you all enjoy this meal, and I will meet you in the kitchen!


Lemon Herb Roasted Potatoes
Yields 4 to 6 Servings


You will need:


  • 6 to 8 large sized russet potatoes, peeled and cut into 2-inch chunks
  • Juice of one lemon
  • 1/4 to 1/3 cup olive oil 
  • 1/2 teaspoon kosher salt
  • 1/2 teaspoon cracked black pepper
  • 1.5 tablespoons dried oregano, thyme and rosemary
  • 1 whole garlic bulb broken into 4 pieces


Ready?


  1. Parboil the potatoes in salted water for about 3 to 4 minutes, no longer.
  2. Meanwhile in a 375 degree oven, heat a baking pan of sufficient size to hold your potatoes without crowding them. 
  3. After parboiling, drain the potatoes and let them stand for 5 minutes. 
  4. Toss the potatoes with the lemon juice.
  5. Add the salt, pepper, herbs, garlic cloves and olive oil.
  6. Transfer the seasoned potatoes, garlic and oil to the hot baking pan. 
  7. Roast the potatoes for about 60 to 75 minutes or until they are nicely golden brown all over, turning them every 20 minutes or so. After the first 10 minutes, give the pan a shake to make sure the potatoes are not stuck to it.
  8. Serve and enjoy!


~~~~~~~~~~~~~~~~~~~~~~~~~~~~~~~~~~~~~~~~~~~~~~~~~~~


Coconut Chicken Tenders
Yields 6 Servings


You will need:


  • 1 cup vegetable oil
  • 2 pounds boneless, skinless chicken breasts, cut into strips
  • Kosher salt and freshly ground black pepper, to taste
  • 2 large eggs
  • 1 teaspoon soy sauce
  • 1 teaspoon Sriracha
  • 1/2 teaspoon garlic powder
  • 1/4 teaspoon ground ginger
  • 1.5 cups Original Bisquick™ mix
  • 1 cup shredded sweetened coconut
  • 2 tablespoons chopped fresh cilantro leaves


Ready?


  1. Heat vegetable oil in a large skillet over medium high heat.
  2. Season chicken with salt and pepper, to taste.
  3. In a large bowl, whisk together eggs, soy sauce, Sriracha, garlic powder, ginger and 2 tablespoons water. 
  4. In another large bowl, combine Bisquick mix and coconut.
  5. Working one at a time, dip chicken into egg mixture, then dredge in Bisquick mixture, pressing to coat.
  6. Working in batches, add chicken to the skillet, 3 or 4 at a time. 
  7. Cook until evenly golden and crispy, about 3 to 4 minutes on each side. 
  8. Transfer to a paper towel-lined plate.
  9. Serve immediately, garnished with cilantro.
  10. Enjoy!


I apologize for the long wait for this post. It's been one crazy week to say the least! I assure you that I will do my best to be back sometime this week, so stay tuned. I hope y'all have a great weekend, and I'll see you all soon. Happy blogging, and I'll catch you on the flip side.


~Mandie