Wednesday, July 31, 2013

Dani Wednesdays: Saucy Pork chops with Mushrooms and Onions


I am so very excited to have finished my first quilt-as-you-go baby blanket. This was for a GF of mine whose daughter is about to turn 1 years old. Blankets make me think of comforting food, which meant gravy. So here is my adjusted recipe that does not involve a lot of fat or salt.


Saucy Pork chops
Serves 3


Ingredients:


  • 3 boneless pork loin chops
  • 1 c flour for dredging, seasoned as you like (garlic, pepper, oregano & paprika, is what I use)
  • 1 egg, scrambled
  • 1 tbsp water
  • 3 tbsp olive oil (extra virgin)
  • 1 medium onion, thinly sliced
  • 1 pkg of sliced baby bella or porcini mushrooms
  • 1 tbsp Italian seasoning
  • 1 tsp pepper
  • ½ - 1 cup of white wine, chicken bouillon or water (depending on how dry your pan is at this time)
  • 1 glove of garlic minced 
  • 1 tsp of cornstarch
  • 2 tbsp of water


  1. Scramble egg and water together until combined
  2. Dip pork chop in egg mixture and dredge in flour to coat, set aside and repeat for remaining chops
  3. Heat oil in skillet on medium until oil starts to shimmer
  4. Cook chops until golden brown on both sides (about 3 mins per side)
  5. Remove from pan and set aside
  6. In skillet with remaining oil and juices, add onions, mushrooms and spices
  7. Sauté until onions begin to brown and mushrooms have cooked down, about 7-10 minutes.
  8. Add water and garlic continue to sauté for another minute
  9. Make slurry by combining cornstarch and water
  10. Add to veggie mixture and stir as it thickens
  11. Return pork chops to skillet and simmer for about 5 mins
  12. Eat and enjoy!


If you have not become accustom to cooking without salt, ½ tsp of sea salt should to the trick. This is a family friendly dish and works in summer and winter. I served mine with sweet potato tots, but mash potatoes or rice would be wonderful as well.


Tuesday, July 30, 2013

Hot Colby Ham Sandwiches

Hey foodies! Guess what? Our AC is fixed! That's like, the best thing ever! After staying up ALL night, we managed to contact the manager, have the maintenance men come right over, and wait all morning until noon-ish for that wonderful blast of cold air. It felt fabulous.

Now that things are fixed, that means we can get back into the kitchen and make those tasty meals that everyone enjoys, however, I'm still in strike mode. We will be making a tasty meal, but luckily this isn't one of those meals that requires 10,000 hours in the kitchen.

The meal we will be making is hot Colby ham sandwiches. These bad boys remind me of Arby's, only they look gourmet. They are perfect for family gatherings, parties, and social get-togethers. Well, I'm going to make my way toward the kitchen. I hope to see you all there!


Hot Colby Ham Sandwiches
Serves 4


You will need:


  • 1/2 cup butter, melted
  • 2 tablespoons prepared mustard
  • 1 tablespoon dried minced onion
  • 1 tablespoon poppy seeds
  • 2 to 3 teaspoons sugar
  • 8 hamburger buns, split 
  • 8 slices Colby cheese
  • 16 pieces thinly sliced deli ham (about 1 pound)
  • 1.5 cups (6 ounces) shredded part-skim mozzarella cheese


Ready?


  1. In a small bowl, combine the butter, mustard, onion, poppy seeds and sugar. 
  2. Place roll bottoms, cut side up, in an ungreased 15-in. x 10-in. x 1-in. baking pan. 
  3. Top each with Colby cheese, ham and mozzarella. 
  4. Brush with half of the butter mixture.
  5. Replace the roll tops. 
  6. Brush with the remaining butter mixture. 
  7. Bake, uncovered, at 350 degrees for 10 to 15 minutes or until cheese is melted.
  8. Enjoy!


See how easy that was? I like to think that that was one of the simpler meals we've made from this blog. Now, my friends, I urge you to go out with friends and family and enjoy those delicious mock-gourmet sandwiches. Stay tuned for Dani Wednesdays, and until then, happy blogging to all!


Monday, July 29, 2013

Southwestern Stuffed Peppers


Hey foodies! Before we start, I've got some ranting to do. I promise it pertains to the recipe I've chosen for tonight. Okay, so I live in Texas. Dallas/Fort Worth to be exact. If you live anywhere in the South, from California to Florida, or anywhere in between, you should know that Summers are excruciatingly hot and humid. Unfortunately, my house, more specifically, our AC unit has been on the fritz this entire Summer. We've called maintenance, had some random part replace, filled the freon multiple times, and yet nothing seems to be working. Not to mention our fridge started making funky noises tonight. We fear the fridge is on strike because of the heat as well. Like, seriously, every week since the start of Summer we've called in the maintenance crew and nothing's been fixed. It's horrible!

Now, because of this heat, I'm going on strike. I don't want to spend any more time in the kitchen than need be. The recipe I've chosen for tonight will have us in the kitchen for a total of 40 to 50 minutes. Much of that time will be spent with the peppers roasting. The other time will be allotted to browning the turkey breasts and rice. So, before we all overheat and melt, why don't you meet me in the kitchen so we can make dinner and then go cool down? I'll meet you there!


Southwestern Stuffed Peppers
Serves about 3


You will need:


  • Olive Oil
  • 1/2 pound lean ground turkey breast
  • 1 cup chopped onions
  • 1 heaping tablespoon of taco seasoning
  • 2 cups cooked rice
  • 3 to 4 organic bell peppers, halved and seeds removed
  • 1 can of black beans, drained & rinsed
  • 1/2 cup of organic frozen corn
  • 1 (16 ounce) jar of salsa
  • Shredded Cheddar Cheese


Toppings:


  • fresh cilantro
  • sour cream
  • sliced avocado


Ready?


  1. Before beginning anything, cook your rice according to the package directions.
  2. Brown the ground turkey.
  3. Saute the chopped onions until just cooked through.
  4. Meanwhile, preheat the oven to 400 degrees. 
  5. Lightly coat the peppers with olive oil and roast in a baking dish for about 20 to 25 minutes, just until cooked through. 
  6. Remove the peppers from the oven and allow to cool until you can handle them.
  7. In a bowl add the taco seasoning, cooked ground turkey, chopped onions, black beans, corn and rice. 
  8. Add in the jar of salsa, then mix well.
  9. Carefully spoon the turkey mixture into each half of the bell peppers and place back into the baking dish. 
  10. Cook the peppers for another 15 to 20 minutes or until the peppers are cooked all the way through. 
  11. Before removing from the oven sprinkle the tops of each pepper with shredded cheddar cheese. 
  12. Place back into the oven just until the cheese has melted.
  13. Remove from the oven and top with fresh cilantro, avocado slices and/or sour cream just before serving.
  14. Enjoy!


Now, I urge you and your family to enjoy tonight's meal, as well as stay cool and hydrated. This Summer is turning out to be almost TOO hot. Anyway, I'll be back tomorrow (and hopefully in a better, cooler mood). Until then, have a great day, and happy blogging to all!


Sunday, July 28, 2013

Peanut Butter & Jelly French Toast Sandwiches


Hey bloggers, foodies, and friends! I know yesterday was supposed to be our Breakfast Saturday entry, but honestly, I got distracted. It's been happening a lot lately due to all the knitting I've been doing, amongst other this. This morning, I wanted to make up for that by going through with a breakfast recipe.

I love french toast, and I love peanut butter and jelly sandwiches. I was pleasantly surprised when this recipe decided to combine the two of them. This recipe normally serves 2 people, but we're doubling up so we can feed a full sized family if needed. So, grab those aprons and I'll meet you in the kitchen!


Peanut Butter & Jelly French Toast Sandwiches
Serves 4


You will need:


  • 4 Eggs
  • 8 Slices Bread
  • A pinch of Salt
  • 2 Tablespoons Milk
  • 1 Teaspoon Vanilla
  • Your favorite jelly
  • Your favorite peanut butter
  • powdered sugar, for dusting


Ready?


  1. Mix the 2 eggs, 1 tablespoon of milk, pinch of salt and 1/2 teaspoon of vanilla until it is all combined.
  2. Add a pat of butter to an iron skillet over a medium-high heat. 
  3. When the butter has melted and coated the whole pan, dip your bread into the batter, letting any excess drip off. 
  4. Fry it up until it is golden brown on each side.
  5. Make the peanut butter and jelly sandwich using the french toast.
  6. Repeat until all sandwiches are made.
  7. Cut them in half, dust with powdered sugar, then serve.
  8. Enjoy!


Thanks for joining me today. I'll do my best to be back tomorrow with a regular recipe (unless you all request otherwise). Have a great Sunday, and happy blogging to all!


Friday, July 26, 2013

Ribeye Steak with Onion Blue Cheese Sauce


Hey bloggers and foodies! Today is Friday, and you know what Friday means? For me it means hanging out, checking the sports scores, and hearty, delicious grub that I would normally go out of my way to make during the week due to time constraints. Along with those things that I normally have no time to do is grilling. I think that the best time to grill is on the weekends when my friends and family can be there with me, drinking a few beers and laughing. A LOT.

For tonight's recipe, we will be grilling steak. This recipe serves two, so if you have friends or family to feed, you will need to increase the proportions, but luckily, this recipe is easy so doubling or even tripling won't be too big of a deal. So, let's go fire up those stovetop grills, and I'll meet you in the kitchen!


Grilled Ribeye Steak with Onion Blue Cheese Sauce
Serves 2


You will need:


  • 2 whole Ribeye Steaks
  • 2 Tablespoons Butter
  • Salt
  • Pepper
  • 4 Tablespoons Butter
  • 1 whole Very Large Yellow Onion, Sliced
  • 1 cup Heavy Cream
  • 1/2 cup Crumbled Blue Cheese


Ready to get our grill on? Let's do this.


  1. Salt and pepper both sides of the steaks. 
  2. Grill in 2 tablespoons butter until medium rare (Feel free to cook to your preferred doneness). 
  3. Saute the onions in 4 tablespoons butter over high heat. 
  4. Cook for 5 to 7 minutes, or until dark and caramelized. 
  5. Reduce heat to a simmer and pour in the cream. 
  6. Cook for 3 to 5 minutes, or until reduced by half. 
  7. Stir in blue cheese until melted. 
  8. Serve steaks on a generous portion of sauce.
  9. Enjoy!


Thanks for joining me tonight. Stay tuned for tomorrow's edition of Breakfast Saturday. It's sure to be something delicious! Until then, have a great Friday, and happy blogging to all!


Thursday, July 25, 2013

Roasted Shrimp Enchiladas with Jalapeno Cream Sauce


Hey foodies, friends, and bloggers! Lately, I've been craving seafood, but what's new? I've also been craving Mexican food. Tonight's recipe combines both of those things into one great meal! It has the zestiness from the jalapeno cream sauce, and the shrimp for the seafood aspect. Honestly, I don't know why I never took a better glance at this recipe before.

This meal takes between 30 to 45 minutes to make, and it serves 3 to 4 people, so it's a nice sized meal. If you have a seafood or shrimp allergy, feel free to check out this classic Cheesy Chicken Enchilada recipe. It still has a zest to it to satisfy those spice lovers out there, but it's safe to eat for those with allergies. Now, I'm going to head into the kitchen and I hope you'll join me. See you there!


Roasted Shrimp Enchiladas with Jalapeno Cream Sauce
Serves 3 to 4


You will need:


  • 1 pound medium shrimp, peeled and deveined
  • 2 tablespoons olive oil, divided
  • Kosher salt and freshly ground black pepper, to taste
  • 2 cloves garlic, minced
  • 1 small onion, diced
  • 2 cups shredded green cabbage
  • 1 carrot, peeled and grated
  • 3 cups baby spinach
  • 2 tablespoons chipotle pepper, in adobo sauce
  • 1/4 teaspoon oregano
  • 1/2 teaspoon cayenne pepper
  • 12 (6-inch) corn tortillas, warmed
  • 2 cups Monterey Jack cheese


For the jalapeño cream sauce:


  • 2 tablespoons unsalted butter
  • 2 tablespoons all-purpose flour
  • 1 1/2 cups chicken broth
  • 3/4 cup sour cream
  • 2 jalapeños, seeded and minced
  • 1/2 teaspoon garlic powder
  • Kosher salt and freshly ground black pepper, to taste
  • 1/4 cup chopped fresh cilantro


Ready?


  1. Preheat the oven to 400 degrees. 
  2. Line a baking sheet with parchment paper.
  3. Place the shrimp onto the prepared baking sheet. 
  4. Add 1 tablespoon olive oil, salt and pepper, to taste, and gently toss to combine.
  5. Place into oven and roast just until pink, firm and cooked through, about 6 to 8 minutes. 
  6. Remove from the oven and let cool before dicing into bite-size pieces.
  7. Reduce the oven temperature to 375 degrees. 
  8. Lightly oil a 9x13 baking dish or coat with nonstick spray.
  9. Heat the remaining 1 tablespoon olive oil in a large skillet. 
  10. Add the garlic and onion and cook, stirring occasionally, until the onions become translucent, about 5 minutes. 
  11. Add the cabbage, carrot, spinach, chipotle pepper, oregano and cayenne. 
  12. Cook, stirring occasionally, until the spinach just begins to wilt, about 1 to 2 minutes. 
  13. Add the shrimp and gently toss to combine.
  14. To make the sauce: melt the butter in a large saucepan. 
  15. Whisk in the flour until lightly browned, about 1 to 2 minutes. 
  16. Gradually whisk in the chicken stock and cook, whisking constantly, until incorporated, about 1 to 2 minutes. 
  17. Stir in the sour cream. 
  18. Add the jalapeños and garlic powder and simmer until the sauce has thickened, about 2 minutes, then season with salt and pepper, to taste. 
  19. Remove from heat and stir in the cilantro.
  20. To assemble the enchiladas, lay the tortilla on a flat surface and spoon 1/3 cup of the shrimp mixture in the center. 
  21. Sprinkle with cheese. 
  22. Roll the tortilla and place seam side down onto prepared baking dish. 
  23. Repeat with remaining tortillas and shrimp mixture.
  24. Pour half of the jalapeño cream sauce evenly over the top. 
  25. Place into oven and bake, covered, until lightly golden and bubbly, about 20 minutes.
  26. Serve immediately with remaining jalapeño cream sauce, garnished with cilantro.
  27. Enjoy!


I'll be back soon. Until, have a great day, and awesome dinner, and happy blogging to all!


Wednesday, July 24, 2013

Dani Wednesdays: Greek Mini Turkey Burgers


This week I am posting one of my client’s favorite meals. The bonus is my son said, “Mom, this is the bestest dinner ever!” We have been experiencing crazy humid weather here in California, so this is a nice light meal when you feel all sweaty. Aside from the turkey, I add quinoa and lots of veggies. Perfect way to sneak vegetables and fiber into your family’s diet.


Greek Mini Turkey Burgers


  • 1 package of lean ground turkey
  • ½ c cooked quinoa
  • 1 medium carrot, shredded
  • 1 medium zucchini, shredded
  • 2 egg whites
  • 2 tbsp Greek seasoning
  • 1 tbsp fresh dill
  • 1 tbsp olive oil


Optional:

  • Field greens
  • Feta
  • Tzatziki – recipe below
  • Sliced tomato


  1. Combine all dry ingredients in a large bowl, mixing well. (This will lessen the mixing once the turkey is added. Over worked turkey will be tough after cooking) 
  2. Add turkey and eggs mixing by hand. 
  3. Use a tbsp to measure 2 spoonfuls into your hand and form into a patty. 
  4. Continue until all meat mixture has been pattified. 
  5. Add olive oil to a skillet and heat to medium. 
  6. Cook patties until they are browned on each side, about 4 minutes a side or until internal temp reaches 180 degrees.


Below is a recipe for Tzatziki. I like to serve these burgers in tortillas with field greens, feta and this sauce. Super delicious!


Tzatziki – yogurt cucumber sauce


  • 8 oz Greek plain yogurt
  • 2 tbsp fresh dill
  • 1 clove of garlic, minced
  • 1/3 c diced cucumber
  • 1 tsp wine vinegar


Combine and top your favorite burger, salad or just eat with pita chips.


Enjoy!


Tuesday, July 23, 2013

Steak Burritos

Hello foodies and friends! Tonight we will be making an easy meal that you can wrap in foil and eat on the go. The reason for this is my big sister and I have been in the middle of knitting, so we really need our hands free for handling the yarn. The recipe we will be making is steak burritos. It takes 30 minutes total, and it's sure to be a hit with any man in your life, seeing as men are carnivores and what do carnivores love? Meat!

For those of you who are health conscious, fret not. This meal is made with brown rice and whole wheat tortillas. You can easily substitute the tortillas and rice for regular tortillas and white rice if preferred. Now, I'm going to zip off to the kitchen. I hope to see you all there!


Steak Burritos
Serves 4


You will need:

  • 1/2 cup prepared fresh salsa
  • 1/2 cup water
  • 1/4 cup instant brown rice
  • 1 (15-ounce) can black beans, rinsed
  • 12 ounces strip steak, trimmed and thinly sliced crosswise
  • 1/4 teaspoon freshly ground pepper
  • 1 tablespoon canola oil
  • 4 (8-inch) whole-wheat tortillas
  • 1/2 cup shredded sharp Cheddar cheese
  • 1/4 cup prepared guacamole
  • 2 tablespoons coarsely chopped fresh cilantro


Ready?


  1. Combine salsa and water in a small saucepan. 
  2. Bring to a boil. 
  3. Stir in rice, then reduce heat to a simmer, cover and cook for 5 minutes. 
  4. Stir in beans, return to a simmer and cook, uncovered, stirring occasionally, until the rice is tender and most of the liquid is absorbed, about 5 minutes more.
  5. Meanwhile, sprinkle the steak with pepper. 
  6. Heat oil in a large skillet over medium-high heat. 
  7. Add the steak and cook, stirring occasionally, until browned and cooked through, 3 to 5 minutes.
  8. To assemble, divide the steak among the tortillas and top with equal amounts of cheese, guacamole, cilantro and the rice mixture. Roll each tortilla up into a burrito.
  9. Enjoy!


I'll be back soon with another recipe. Until then, I hope to see you all around. Have a great day, and happy blogging to all!


Sunday, July 21, 2013

Deep Fried Catfish and Sweet Potato Parmesan Tater Tots

Happy Sunday foodies and friends! Today we will be deep frying catfish! How fun is that? Many of my memories involve going on fishing trips, catching fresh fish, and frying those bad boys up for dinner. It always turned out deliciously! We will also be making sweet potato parmesan tater tots.

I'm really picky with tater tots. I'll easily eat sweet potatoes any time, but bland, processed tater tots are like my kryptonite. They make me angry and I can't function because they are just... yuck. Okay, maybe I'm over-exaggerating, but still. Anyway, I'm really excited to pair these two items together. I love fish and I love sweet potatoes, so it's a win-win for me. I hope it'll be a win-win for your family and friends as well.

I'll be making my way toward the kitchen, so I'll see you all there!


Deep Fried Catfish and Sweet Potato Tater Tots


For the Tater Tots, you will need:


  • 3 medium sweet potatoes
  • 2 tablespoons butter, melted or softened
  • 3/4 cup freshly grated parmesan cheese, plus more for sprinkling
  • 1/2 teaspoon salt
  • 1/2 teaspoon pepper
  • 2 cups sweet potato chips crumbs


For the Catfish, you will need:


  • 3-4 medium catfish pieces per person
  • 1 cup white cornmeal
  • 1/3 cup all purpose flour
  • 2 teaspoons salt
  • 2 teaspoons lemon pepper
  • 1 teaspoon paprika
  • 1/4 teaspoon garlic powder
  • 2 medium eggs
  • 1/4 cup buttermilk
  • Peanut Oil - enough to cover the fish


Ready?


To Make the Tater Tots:

  1. Preheat the oven to 400 degrees. 
  2. Poke the sweet potatoes all over with a fork. 
  3. Bake directly on the rack until tender, for 50 to 60 minutes. 
  4. Allow to cool for 10 minutes.
  5. Once cool, use your hands to peel away the sweet potatoes skin. They should just easily slip off. 
  6. Place the potatoes in a medium size bowl and mash with the butter. 
  7. Stir in the parmesan cheese, salt and pepper to taste.
  8. Grease a baking sheet with olive oil and place the sweet potato chip crumbs in a shallow bowl. 
  9. Scoop about 1 tablespoon of the sweet potato mixture into you hand and roll into a cylinder. The sweet potato mixture will be wet, but this is fine. 
  10. Roll the sweet potatoes in the chips and coat well. 
  11. If you need to re-shape the cylinders do so now. 
  12. Place on the prepared baking sheet. 
  13. Repeat until all of the sweet potato mixture is gone. 
  14. Spray the tater tots with cooking spray and then sprinkle with more parmesan cheese if desired. 
  15. Bake for 15 minutes and flip the the tater tots over and bake another 10 to 15 minutes or until golden and crisp. 
  16. Remove from the oven and serve immediately.


To Make the Catfish:

  1. Combine all your ingredients. 
  2. Beat the eggs and buttermilk in a medium sized bowl. 
  3. Wash the catfish fillets and pat dry.
  4. Dip the fillets in the egg wash, shake off excess wash, then roll in the cornmeal mix to coat thoroughly on all sides. 
  5. Make sure the oil is hot, then place the fish in the frying pan. 
  6. Fry until golden brown on both sides.
  7. Drain on paper towels.
  8. Enjoy!


I'll be back soon with more food fun. Stay tuned, and until then: have a great day, and happy blogging to all!


Saturday, July 20, 2013

Breakfast Saturday: Bacon, Egg, and Cheese Crescent Rolls

Good morning foodies! Welcome to our Saturday Edition of The Tasteful Texan! This morning we will be making scrumptious bacon, egg, and cheese crescent rolls. This recipe is from Pillsbury. Speaking of which, my family is gaga over warm, flaky Pillsbury biscuits. Yum yum! It just seemed natural that we should do a breakfast recipe from Pillsbury.

This is one of those super easy, done in 30 minutes, bring-your-kids-to-help-out sort of recipes. The end result will have your little ones asking for more, I assure you. When my household makes recipes like this, all 3 men come running. These would fly off our counters in a millisecond. No joke. We here take breakfast very seriously. It's normal for us to eat breakfast for dinner at least 2 to 3 times a week. Anyway, I'm getting off course. Why don't you meet me in the kitchen and we can start making breakfast? I'll see you there!


Bacon, Egg, and Cheese Crescent Rolls
Makes 8 Servings


You will need:


  • 1 can (8 ounces) Pillsbury® refrigerated crescent dinner rolls
  • 8 slices bacon, crisply cooked, crumbled
  • 4 eggs, scrambled
  • 1/2 cup finely shredded Cheddar cheese
  • 1 egg, beaten
  • 1 tablespoon cracked black pepper


Ready?


  1. Scramble the eggs in a hot pan (or alternately, in a medium microwavable bowl, microwave uncovered on High 1.5 minutes. Stir the cooked outer edges of the eggs to the center. Microwave 1 to 2 minutes longer or until the eggs are almost set but still moist.)
  2. Meanwhile, fry the bacon as you normally would. 
  3. When the bacon is done, crumble in a food processor until just broken up.
  4. Heat the oven to 350 degrees. 
  5. Unroll the dough onto a work surface, and separate into triangles.
  6. Top each triangle with bacon, scrambled egg and cheese. 
  7. Roll up the triangles loosely. 
  8. Place triangles on an ungreased cookie sheet, and gently curve the rolled up triangles into crescent shape. 
  9. Brush with the beaten egg, and sprinkle with pepper.
  10. Bake for 18 to 20 minutes or until golden brown.
  11. Enjoy!


I'll be back again tomorrow with another recipe, but until then, have a great day and Happy Blogging to all!


Friday, July 19, 2013

Homemade Cheez-Its

Hey foodies, bloggers, and friends! Welcome to The Tasteful Texan! Today we will be making one of my favorite snacks. It also happens to be my big sister's favorite snack as well: Cheez-Its. We could easily go out to our local market and buy a box of processed cheese squares, but have no idea what all those huge words in the ingredients list are. We won't have any of that non-sense in our cheesy squares today!

I know normally we make a dinner recipe, or maybe a lunch recipe, but I've been eyeing this recipe for months. Yes, months. I wasn't sure when I wanted to incorporate the yumminess into the blog, but now seems like a really good time. In fact, my mouth is watering just thinking about the cheesy goodness, so why don't you all meet me in the kitchen and we'll whip up a batch? I'll meet you there! Allons-y!


Homemade Cheez-Its


You will need:


  • 1 cup all-purpose flour
  • 4 tablespoons unsalted butter, cut into small pieces
  • 8 ounces sharp cheddar cheese, grated
  • 3/4 teaspoon salt
  • 1/2 teaspoon ground mustard
  • 2 tablespoons cold water


Ready?


  1.  In a food processor, pulse everything except water together until it looks like coarse crumbs.
  2.  While pulsing, add in water 1 tablespoon at a time.
  3.  Remove from food processor, wrap in plastic wrap and put in the refrigerator for at least 20 minutes.
  4.  Meanwhile, preheat the oven to 350 degrees.
  5.  Roll out the dough (very thin) and cut into squares. 
  6.  Use a toothpick, or the end of a scissors to poke a hole in the middle of each cracker.
  7.  Place the crackers on a lined baking sheet. 
  8.  Bake for 13 to 15 minutes or until crispy.
  9.  Enjoy!


I hope your kids and family enjoy these tasty cheese squares! I'll be back soon with some sort of a new recipe. Stay tuned because Breakfast Saturday is coming up soon. I'll see you all there! Until tomorrow, I bid you all a good day, and happy blogging to all!


Wednesday, July 17, 2013

Dani Wednesdays: Low-Salt Chicken Tenders

Hello, again. As promised, I am sharing on of my new recipes I was working on for my client. Turns out my son really liked these and loves the leftovers cold in his lunch the next day. The key to low or very low salt cooking is adding spices. Need to use more than you normally would to make up for the loss of flavor from the sodium.


Low Salt chicken tenders


Ingredients:
  • 1 lbs of chicken tenders
  • 1-2 cups of almond flour (found at a health food store Trader Joes)
  • 1 tbsp of Italian seasoning (one without salt)
  • ½ c parmesan cheese (I used one with only 1% salt)
  • ½ tsp paprika
  • ¼ tsp granulated garlic
  • 1 egg slightly beaten
  • Spray cooking oil
  • 2 baking sheets
  • Aluminum foil


Instructions:
    1. Preheat oven to 375 degrees
    2. Line baking sheets with foil
    3. Prepare 2 flat bowls or pie plates, one with egg mixture & the other with flour, cheese and other spices
    4. Pat chicken tenders dry with paper towel
    5. Dip one tender at a time in egg, followed by flour mixture
    6. Place on sheet making sure it has space from other chicken pieces
    7. Once all chicken has been breaded, lightly spray with cooking oil
    8. Bake for 15-20 mins, until chicken is golden and measures 180 degrees
    9. Enjoy


You can serve these alone or with your favorite sauce. I prefer buffalo sauce; my son just eats them plain. Hope you enjoy this recipe as much as I do!


Tuesday, July 16, 2013

Green Chicken Chili Tamales

Hey my friendly foodies! Welcome to The Tasteful Texan! If this is your first time joining us, you're in for a delicious recipe. We will be making tamales. I'm super excited about this. Now, normally I don't have time to make tamales. We do have this amazing older lady who frequents our apartment complex delivering various tamales. She usually has chicken, pork, and beef on hand. I must say we love when she visits. Yum yum!

Well, unfortunately our lovely tamale lady isn't around to deliver her scrumptious tamales, so we will be making these ourselves. This is a pretty lengthy process, but believe me when I say that these will come out beautifully! For now, I invite all of you to join me in the kitchen. We'll whip quite a few of these. I'll meet you there!


Green Chicken Chili Tamales
Yields 30


You will need:


  • Kitchen Twine
  • 6 oz package corn husks


For the Chicken, you will need:


  • 2.5 pounds chicken breasts, trimmed
  • 4.5 cups warm water
  • 2 Knorr Homestyle Chicken Stock
  • 1 cup Salsa Verde
  • 1 teaspoon garlic salt


For the Filling, you will need:


  • 1.5 pound tomatillos, husked, rinsed
  • 5 large jalapenos, seeded, sliced in half lengthwise
  • 6 large garlic cloves
  • 1.5 tablespoons olive oil
  • 1 cup chopped fresh cilantro


For the Dough, you will need:


  • 1 1/3 cups vegetable shortening
  • 1.5 teaspoons salt
  • 1.5 teaspoons baking powder
  • 4 cups Masa
  • 2 cups (maybe a little more) low-salt chicken broth
  • 2.5 cups fresh corn, about 4 ears


  1. For the Chicken: In the bowl of your slow cooker, mix warm water, Knorr homestyle stock, salsa verde, and garlic salt. 
  2. Once fully mixed, add the chicken. 
  3. Cook on high for 4 hours. 
  4. Pour the juice/chicken stock into a large bowl, set aside. 
  5. Shred the chicken and set aside.
  6. For the filling: Place the husks in a large pot or large bowl, then add enough hot water to cover. 
  7. Place a heavy plate on the husks to keep submerged. 
  8. Let stand until the husks soften, about 30 minutes. 
  9. You can let this happen while you are preparing the dough and filling.
  10. Meanwhile, heat the broiler. 
  11. Line a heavy baking sheet with foil. 
  12. Arrange the tomatillos on the prepared sheet. 
  13. Broil for 6 minutes, then remove from the oven. 
  14. Turn each tomatillo over. 
  15. Add the jalapeno to the baking sheet and return to the broiler. 
  16. Broil for 6 more minutes and remove from the oven completely.
  17. Transfer the tomatillos, jalapenos, and any juices on baking sheet to the food processor (or blender). 
  18. Add garlic to the processor and blend until a smooth puree forms. 
  19. Heat oil in a medium saucepan over medium-high heat. 
  20. Add the tomatillo puree and boil for 5 minutes, stirring often. 
  21. Add 2 cups of the leftover juice from the slow cooker. 
  22. Reduce heat to medium, then simmer until sauce coats a spoon thickly, stirring occasionally, about 40 minutes. 
  23. Season with salt. 
  24. Mix in chicken and cilantro.
  25. For dough: Using a stand mixer, beat the vegetable shortening with salt and baking powder, until fluffy. 
  26. Beat in the masa in 4 additions. 
  27. Reduce speed to low and gradually beat in 2 cups broth, forming a tender dough. 
  28. If the dough seems firm, beat in enough broth, 2 tablespoons at a time, to soften, then gently stir in the corn kernels.
  29. Meanwhile, open 1 large husk on the work surface. 
  30. Spread 1/4 cup of dough into a 4-inch square in the center, leaving 2- to 3-inch plain border at the narrow end of the husk. 
  31. Spoon a heaping tablespoon of filling into a strip down the center of each dough square. 
  32. Fold the long sides of the husk and dough over filling to cover. 
  33. Fold up both ends of the husk. 
  34. Tie the tamale with twine. 
  35. Stand the tamales in a steamer basket. 
  36. Repeat with more husks, dough, and filling until all filling has been used. 
  37. If necessary to keep tamales upright in steamer, insert pieces of crumpled foil between them.
  38. Fill a pot with about 2 inches of water, place in the 2-inch ceramic oven safe dish, and bring water to a boil. 
  39. Carefully place the steamer basket on top of the ceramic dish. 
  40. Steam the tamales until the dough is firm to touch and separates easily from husk, adding more water to pot as necessary, about an hour. 
  41. Let stand for 10 minutes. 
  42. Serve immediately, or freeze.


I know this recipe took a while, but it will feed an army of hungry tamale lovers. My family usually orders 2 dozen and it still isn't enough. I'm positive that your family and friends will be begging you to make more of these delicious tamales. Anyway, I'm out of here for today. I'll be back tomorrow with another (shorter) recipe for you all. Until then, have a great day, and happy blogging to all!


Monday, July 15, 2013

Kung Pao Chicken

Good morning, good afternoon, good evening foodies, bloggers, and friends! Today we will be making some scrumptious Kung Pao chicken. I chose this recipe because as I sit here typing this, my sister and I are playing Sims 3. Our sims are currently on vacation in Shang Simla, China. If you've never played Sims 3, that a play on Shangri La, China. 

I was inspired, thus my choice for today's recipe. I normally don't eat Kung Pao chicken. I have my standard shrimp whatever when I go to a Chinese restaurant, but trying new things is a good thing, right? This is a spicy stir-fry recipe that originates from the Sichuan Province of Central-Western China. 

So, anyway, I'm getting really hungry sitting here thinking about this so why don't we head on over to the kitchen and whip us up some of this delicious chicken? I'll meet you there!


Kung Pao Chicken


You will need:


  • 1 pound boneless-skinless chicken breasts, cut into 1-inch pieces
  • 1 tablespoon cornstarch
  • 2 teaspoons sesame oil
  • 3 tablespoons green onions, chopped
  • 3 garlic cloves, minced
  • ½ teaspoon crushed red pepper flakes
  • ½ teaspoon powdered ginger
  • 2 tablespoons rice wine vinegar
  • 2 tablespoons soy sauce
  • 2 teaspoons sugar
  • 1/3 cup dry roasted peanuts


Ready?


  1. Combine the chicken and cornstarch in a small bowl, then toss to coat. 
  2. Heat sesame oil in a wok over medium heat, add chicken and stir fry 5 to 7 minutes or until no longer pink inside. 
  3. Remove the chicken from the wok.
  4. Add the green onions, garlic, red pepper flakes and powdered ginger to the wok and stir-fry for 15 seconds.
  5. Combine the vinegar, soy sauce and sugar in a small bowl. 
  6. Mix well and add the sauce to the wok.
  7. Return the chicken to the wok and coat with the sauce. 
  8. Stir in the roasted peanuts, and heat thoroughly. 
  9. Top with additional green onions if desired and serve over white rice.
  10. Enjoy!


Thanks for joining me today. I'll be back again tomorrow with another recipe. Until then, have a great day, enjoy your Chinese food, and happy blogging to all!


Saturday, July 13, 2013

Breakfast Saturday: Blackberry Blintzes

Hey foodies, friends, and boggers! Welcome to our Saturday entry to The Tasteful Texan. Today we will be making blintzes. These are thin pancakes that lack a leavening agent. They are a cousin to crepes and blinis, however blinis are typically thicker and DO include a leavening agent.

Blintzes were popularized in the Unites States by Jewish immigrants who used them in typical Jewish cuisine. Blintzes are usually stuffed with some sort of cheese filling, fried, and served on holidays like Chanukah. They are also a traditional meal during Lent in Lithuania. Today, we will be making the crepes, the blackberry sauce, and the ricotta filling that will be in the middle of our blintzes. Sounds fun right? I think so! Let's meet back in the kitchen and we can get started. See you there!


Blackberry Blintzes
Serves 6


For the Blackberry Sauce, you will need:


  • 16 ounces blackberries
  • 1 cup sugar
  • juice of one lemon
  • 3 tablespoons Butter
  • 2 teaspoons corn starch


For the Crepes, you will need:


  • 1 cup flour
  • 1 cup milk
  • 2 eggs
  • 2 tablespoons water
  • 1.5 tablespoons sugar
  • 1 teaspoon baking powder
  • 1/2 teaspoon salt
  • 3 tablespoons butter (for cooking crepes in)


For the Ricotta Filling, you will need:


  • 1.5 cups ricotta cheese
  • 2 ounces cream cheese
  • 3 tablespoons sugar
  • 1 teaspoon lemon zest


Ready?


  1. In a medium sized pot, bring berries, sugar, lemon juice, butter and corn starch to a simmer. 
  2. Gently mash the berries to release juices.
  3. Allow to simmer for five minutes. 
  4. Once the syrup has thickened up, remove from heat. 
  5. Place a strainer over the bowl and strain out the seeds and pulp. 
  6. Set the strained syrup aside while you make crepes.
  7. For the crepes, place all ingredients (except 3 tablespoons butter for cooking crepes) in a food processor or blender. 
  8. Process until smooth.
  9. Heat a skillet (at least 8-inches in diameter) over medium-high heat and generously grease with butter. 
  10. Pour in just enough batter to coat the pan. 
  11. Cook each crepe for 30 seconds on each side.
  12. Pile the cooked crepes up on a plate and cover with a towel to keep them from drying out.
  13. For the ricotta filling, mix all ingredients together in a large mixing bowl until thoroughly combined.
  14. Scoop 1/4 cup of ricotta filling onto the lower section of each crepe. 
  15. Roll up as if making a burrito. 
  16. The bottom flap goes up over the filling, the sides come in, and then roll the blintz away from you to seal.
  17. Heat some butter in a skillet and cook the blintzes until golden brown, about two minutes or so per side.
  18. Place the blintzes in a 9×13 baking dish and bake in a 400 degree oven for 12 minutes to finish cooking the filling. 
  19. Serve with the blackberry sauce.
  20. Enjoy!


I'll be back tomorrow, but until then: have a great day, and Happy Blogging to all!


Friday, July 12, 2013

Cod Fish Sticks with Tartar Sauce

Welcome foodies and bloggers! Tonight we will be utilizing delicious cod to make one of my favorite foods: fish sticks. When I say this is one of my favorite recipes, I absolutely mean that. I eat fish sticks probably more than I should. I'm a seafood lover, and while normal fish sticks don't truly constitute as legit sea food, I still devour those delicious sticks like normal people would with sweets.

For our recipe, we will be using real fish, and not whatever is in store brand fish sticks. We will also be making a yummy tartar sauce to accompany them. I'm really excited about this recipe. I've made other fish sticks with various fish, but I don't think I've ever made them with cod. Now, while I'm still excited, I'm going to make my way into the kitchen. I invite you all to join me. I'll see you there!


Cod Fish Sticks with Tartar Sauce
Yields 4 servings


You will need:


  • 2 pounds skinless cod fillets, cut into 1-inch wide strips
  • Salt 
  • Pepper
  • 1/2 cup all-purpose flour
  • 2 large eggs
  • 1 cup mayonnaise
  • 1.25 cups Panko breadcrumbs
  • 1/4 cup finely chopped dill pickles
  • 1 tablespoon pickle juice
  • 1 tablespoon drained capers, rinsed and minced
  • 1 cup vegetable oil


Ready?


  1. Spread flour in a shallow dish. 
  2. Beat eggs with 1/4 cup mayonnaise in a second shallow dish. 
  3. Spread Panko bread crumbs in a third shallow dish.
  4. Pat the cod dry with paper towels and season with salt and pepper. 
  5. Working with 1 cod strip at a time, dredge the cod strips in flour, dip in the egg mixture, and then coat with breadcrumbs, pressing gently to adhere. 
  6. Transfer the breaded cod to a plate.
  7. Combine the remaining 3/4 cup mayonnaise, pickles, pickle juice, and capers in a bowl and set aside.
  8. Heat the oil in a 12-inch non-stick skillet over medium heat. 
  9. Fry half of the cod strips until deep golden and crisp, about 1 to 2 minutes per side. 
  10. Drain on a paper towel-lined plate. 
  11. Repeat with the remaining cod strips.
  12. Transfer the browned cod strips onto a baking sheet lined with foil. 
  13. Bake at 350 degrees for 15 minutes or until the cod strips are cooked through.
  14. Serve with the tartar sauce.
  15. Enjoy!


I hope your family and children (if you have kids) enjoy these fish sticks. I know I love homemade fish sticks a lot more than store bought brands. Anyway. I'll be back tomorrow with another tasty recipe. Until then, have a great day and Happy Blogging to all!


Thursday, July 11, 2013

Butternut Squash Lentil Soup

Hey bloggers and friends! Today I didn't feel like making anything pertaining to meat. I get in moods where all I want are pancakes, waffles, soups, and pie. This happens to be one of those times. I blame it on my reading addiction. When I start reading, everything else is lost to me. My world disappears and I'm left in an imaginary world of wonder.

For our recipe tonight, we will be making a delicious soup chock full of butternut squash and lentils. For all of you gluten-free folks, this meal will be perfect for you. Heck, this meal will be perfect for soup lovers, vegetarians, and just about anyone in general, well unless you are a kid who dislikes vegetables or a soup hater... But who knows? Maybe we can turn those soup haters into soup lovers! Here's to hopeful thinking! As usual, I invite you into the kitchen, and we'll whip up something delicious. Meet you there!


Butternut Squash Lentil Soup
Serves 4


You will need:


  • 1 tablespoon olive oil
  • 1 onion, diced
  • 3 garlic cloves, finely chopped
  • 2 tablespoons tomato puree
  • 2 teaspoon ground cumin
  • 1 teaspoon ground cinnamon
  • 1 teaspoon salt
  • 1/4 teaspoon cayenne pepper
  • 1 pound butternut squash, diced
  • 2 ounces brown lentils
  • 16 fluid ounces gluten-free vegetable stock
  • 1 tablespoon lemon juice
  • 4 tablespoons non-fat natural soya yogurt, to garnish
  • 2 tablespoons finely chopped coriander, to garnish
  • 2 tablespoons flaked almonds, to garnish


  1. Heat the oil in a large saucepan over a medium-high heat. 
  2. Add the onion and garlic and cook, stirring occasionally, for about 5 minutes or until soft.
  3. Add the tomato purée, cumin, cinnamon, salt and cayenne and give it a quick stir. 
  4. Add the squash, lentils and stock, then bring to the boil. 
  5. Reduce the heat to low and simmer, uncovered, stirring occasionally, for about 25 minutes until the squash and lentils are tender.
  6. Just before serving, stir in the lemon juice. 
  7. Serve hot, garnished with a dollop of the yogurt and a sprinkling of the coriander and almonds.
  8. Enjoy!


Have a great day, and I hope that each of you enjoys this delicious, hearty soup. I'll be back tomorrow, but until then: Happy blogging to all!


Wednesday, July 10, 2013

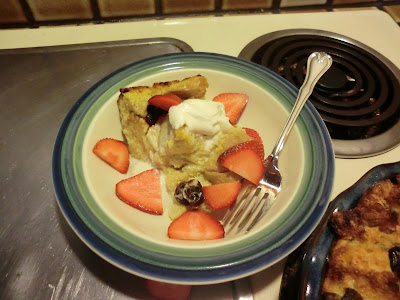
Dani Wednesdays: Cherry-Chocolate Bread Pudding

Lately, I have been busy with my new job as a personal chef. The meals I am making are delicious and I wonder why I do not cook that way at home. Unfortunately when I get home after a day of cooking in someone else’s kitchen, I do not always have the mindfulness to take pictures. That being said, next week I will share with you one of my amazingly delicious salt-free recipes. In the mean time, here is dessert.

Anytime I need a dessert in a hurry, the comfort of bread pudding is my go to.


Cherry-Chocolate Bread Pudding


Ingredients:


  • 1 loaf  - sourdough bread (you can use whatever you like, if sourdough is not available)
  • 6 eggs, slightly beaten
  • 2 c. half & half
  • 2 tsp. vanilla (use the best you have)
  • ½ c. sugar
  • ½ c. dried cherries
  • ½ c. semi-sweet chocolate chips


  1. Preheat oven to 350 degrees
  2. Cut bread into approx. 1 inch pieces
  3. Place bread cubes in a large mixing bowl.
  4. Mix together eggs, half & half, vanilla, sugar (separate bowl)
  5. Pour mixture over bread, add cherries and chocolate.
  6. Stir to combine and all liquid has been absorbed
  7. Grease a baking dish with butter or cooking spray
  8. Put bread mixture into baking dish
  9. Bake for 45 mins or until dessert is golden brown and tooth pick comes out clean.


Serve this with ice cream, whipped cream or powdered sugar. Enjoy!

Tuesday, July 9, 2013

Bourbon Chicken

Hey awesome bloggers and friends! Welcome to a new edition of The Tasteful Texan. Today we will be making a recipe that my husband loves to death. We will be dealing with bourbon chicken. Normally, my husband loves to smother his bourbon chicken in nacho cheese, or whatever nasty kind of cheese he can get his hands on. We will be staying as far away from that as I can get... I mean, why mess up a good thing?

This recipe is super simple. Yes, I really mean super simple. It takes roughly 35 minutes total and makes 4 servings. Can it get any easier? Well, technically you could get in your car, drive to a Chinese restaurant and order, but we want to bask in the almighty awesomeness of something we made for ourselves, right? Yes! So, join me in the kitchen and we can celebrate our delicious dinner victory later. Allons-y!


Bourbon Chicken
Serves 4


You will need:


  • 2 pounds boneless chicken breasts, cut into bite sized pieces
  • 2 tablespoons olive oil
  • 1 garlic clove, crushed
  • 1/4 teaspoon ginger
  • 3/4 teaspoon crushed red pepper flakes
  • 1/4 cup apple juice
  • 1/3 cup light brown sugar
  • 2 tablespoons ketchup
  • 1 tablespoon cider vinegar
  • 1/2 cup water
  • 1/3 cup soy sauce


Ready?


  1. Heat oil in a large skillet.
  2. Add chicken pieces, and cook until lightly browned.
  3. Remove the chicken.
  4. Add all other ingredients, heating over medium heat until well mixed and dissolved.
  5. Add chicken and bring to a rolling boil.
  6. Reduce heat and simmer for 20 minutes.
  7. Serve over white rice, and enjoy!


I'll be back on Thursday, so stay tuned for Dani Wednesday tomorrow. I can't wait to see what she has in store for all of us! Have a great day, and happy blogging to all!


Monday, July 8, 2013

Puffy Chicken Tacos

Hola friends and bloggers! Today, we will be making some scrumptious tacos. These tacos are a specialty of San Antonio, TX. Anything that hails from my home away from home is fine by me. In fact, I can say that aside from San Antonio's rocking barbacoa tacos, the puffy tacos are pretty much "It" food. These tacos are what make Tex-Mex amazing.

On another note, this recipe is for spicy chicken, so if you have sensitive taste buds feel free to scope around on the right side in our archives to see if there's something not so spicy that you'd enjoy! I'm sure we've got a bit of everything for everyone. Now, I'm going to head into the kitchen and I hope you will join me. See you there!


Puffy Chicken Tacos
Serves 12


You will need:


  • 1/4 cup olive oil
  • 2.5 pounds bone-in, skin-on chicken thighs 
  • Kosher salt
  • freshly ground black pepper
  • 6 cloves garlic, finely chopped
  • 1 medium yellow onion, finely chopped
  • 1 rib celery, finely chopped
  • 1 small carrot, finely chopped
  • 1 small red bell pepper, finely chopped
  • 3 cups chicken stock
  • 1 (14 ounce) can whole peeled tomatoes in juice, crushed by hand
  • 2 avocados, pitted, peeled, and mashed
  • 2 cloves garlic, minced 
  • Juice of 1 lime 
  • Canola oil, for frying
  • 3 cups masa harina 
  • 1.5 tablespoons unsalted butter, softened 
  • Shredded iceberg lettuce
  • diced tomato
  • shredded cheddar cheese

NOTE: you can find masa harina in your local Mexican food market, possibly Walmart, and definitely on Amazon.com


Ready?


  1. Heat oil in an 8 quart saucepan over medium-high heat. 
  2. Season the chicken with salt and pepper, and add to the pan, skin side down. 
  3. Cook, turning once, until browned on both sides, about 8 minutes. Transfer the chicken to a plate, then set aside. 
  4. Add the garlic, onion, celery, carrot, and bell pepper to the saucepan, and cook, stirring until soft, about 20 minutes. 
  5. Add the stock and tomatoes, then return the chicken to the pan. Bring to a boil. 
  6. Reduce heat to medium-low, and cook until the chicken is very tender, about 1.5 hours. 
  7. Remove the chicken from the sauce, and let cool. 
  8. Reserve the sauce for another use. 
  9. Discard the skin and bones, and shred the chicken, then set aside. Meanwhile, combine the avocados, garlic, lime juice, salt and pepper in a bowl. 
  10. Chill the guacamole until ready to use, covering to avoid browning.
  11. Pour oil to a depth of 2 inches in a 6 quart Dutch oven and heat over medium-high heat until a deep-fry thermometer reads 375 degrees. Stir together the masa, butter, and 2.25 cups warm water in a bowl until dough forms. 
  12. Divide the dough into 12 pieces and shape each piece into a ball. Using a tortilla press or rolling pin, flatten each ball into a 6.5 inch disk. 
  13. Place 1 disk in the oil. 
  14. When it begins to puff, press the end of a metal spatula into the middle of the tortilla so that the tortilla bends into a taco shape. 
  15. Hold the spatula within the tortilla until the taco is golden brown and crisp, about 1.5 minutes. 
  16. Transfer the taco onto paper towels to drain, and repeat with the remaining tortillas. 
  17. Divide chicken and guacamole among the tacos, then top with lettuce, tomato, and cheese.
  18. Enjoy!


Thanks for joining us here at The Tasteful Texan. I'll be back again tomorrow, like usual with another exciting recipe for y'all. Until then, have a great Monday, and happy blogging to all!